Costruire l’alfabeto smerigliato Montessori per il corsivo – tutorial.
Per prima cosa ho preparato le strisce di carta bianca leggera, (normali fogli A4 da stampante o anche carta da quaderno) piegandola in tre per marcare due righe. Così possiamo essere sicuri che le lettere siano proporzionate tra loro e che si possano congiungere, come avviene con la scrittura.
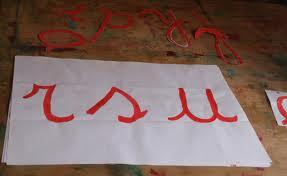
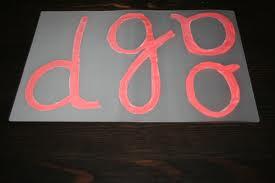
Poi con pennello e tempera rossa ho disegnato le lettere. Ho usato il rosso perchè poi queste sagome non si buttano, ma possono diventare un super economico alfabeto mobile…
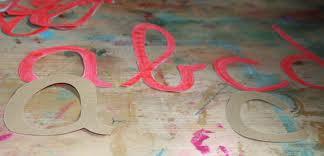
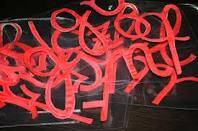
Ritagliate le lettere, le ho posizionate a rovescio sul rovescio della carta vetrata, e ho tracciato i contorni.

Quindi ho ritagliato le lettere dalla carta vetrata e le ho incollate su cartoncino rosa per le vocali e azzurro per le consonanti.
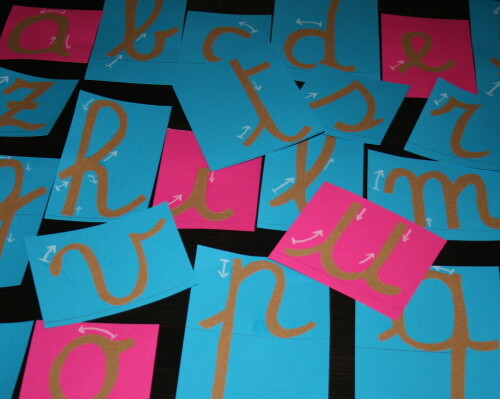
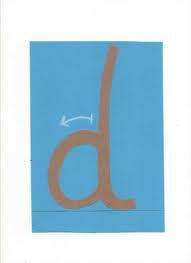
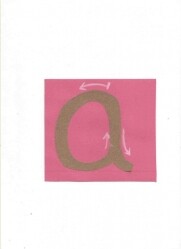
Con la matita bianca ho aggiunto le indicazioni del percorso, e per aiutare i bambini a riconoscere le lettere “che salgono” e le lettere che “scendono”, ho anche tracciato a matita la linea di base.

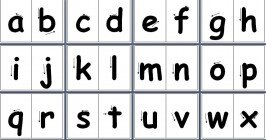
Se preferite usare modelli di lettera stampati invece di scrivere a mano, qui trovate un primo modello, in stampato minuscolo:
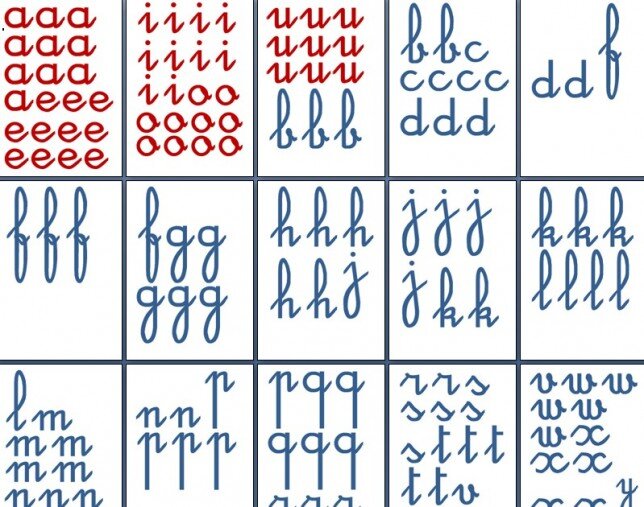
e qui l’alfabeto corsivo minuscolo che potete utilizzare sia per l’alfabeto tattile, sia per quello mobile:
Coi modelli di carta avanzati dalla costruzione dell’alfabeto tattile, si può costruire un semplice alfabeto mobile:


Grazie,grazie,grazie MARIA,
Maria Antonietta, Scuola Primaria ,ho preso molti suggerimenti,ne attendo altri
per la mia prossima quinta,settembre 2017,e per la mia nuova prima Primaria 2018.
Buon lavoro,in bocca al lupo per tutto.
A presto,
Mariantonietta
grazie Maria Antonietta, buon lavoro!