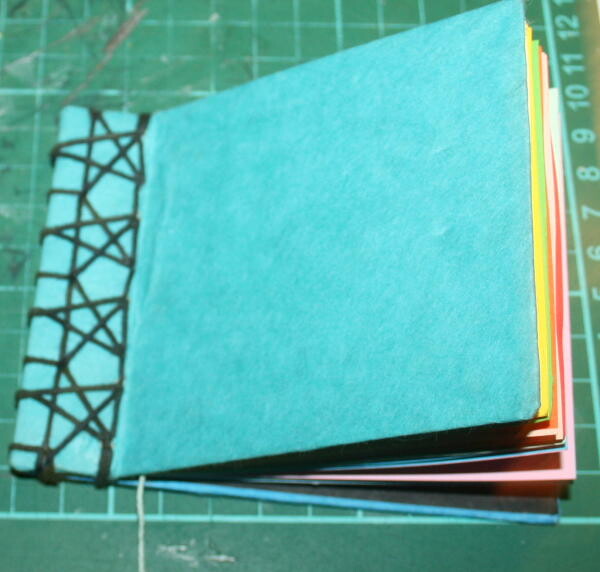
Creare libri per bambini – tutorial per realizzare un libro dei numeri con rilegatura giapponese e stelline. Il libretto è del tipo “string book”: in ogni pagina aumentano il numero di fili e le stelline da contare.
In fondo alla pagina trovi i links per accedere ai tutorial per realizzare il libretto con rilegatura giapponese, e molte altre idee.
![](https://www.lapappadolce.net/wp-content/uploads/2013/01/creare-libri171.jpg)
Materiale occorrente
un libretto formato da 20 pagine colorate (le pagine a due e due per colore); fili di cotone colorati; colla e pezzetti di carta di scarto per rinforzare l’incollaggio; ago; punteruolo; colla; per le stelline carta gialla.
Come si fa
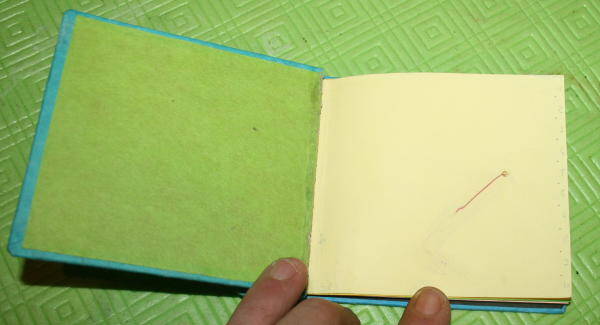
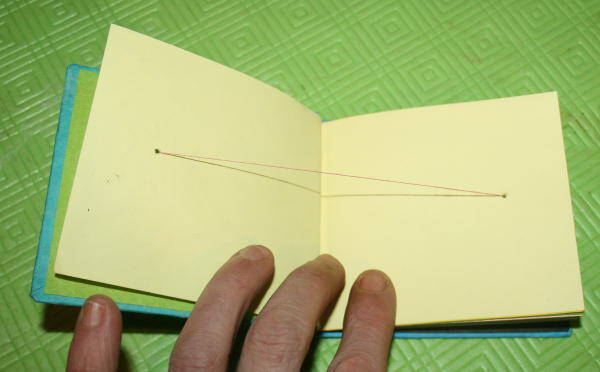
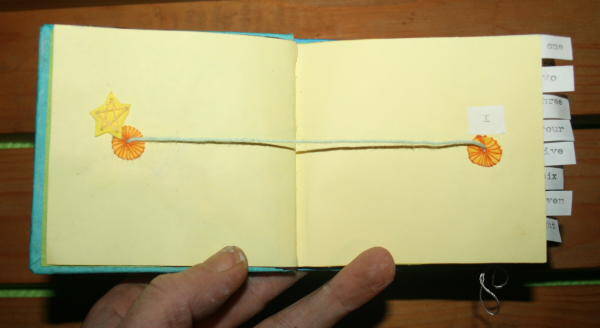
Praticate il primo foro dalla prima all’ultima pagina del libretto (il filo del numero uno):
![](https://www.lapappadolce.net/wp-content/uploads/2013/01/creare-libri-18.jpg)
infilate il filo nel foro della prima pagina e fermatelo con della colla:
![](https://www.lapappadolce.net/wp-content/uploads/2013/01/creare-libri-19.jpg)
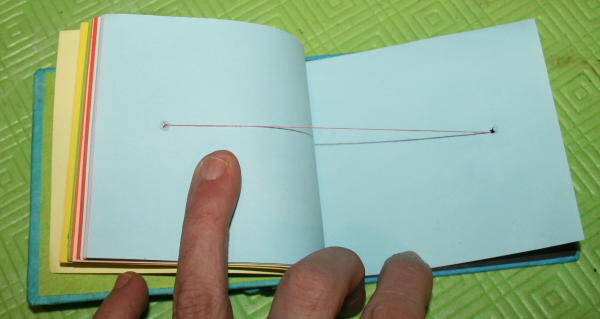
fate passare il filo attraverso tutte le pagine del libretto, fino all’ultima:
![](https://www.lapappadolce.net/wp-content/uploads/2013/01/creare-libri-20.jpg)
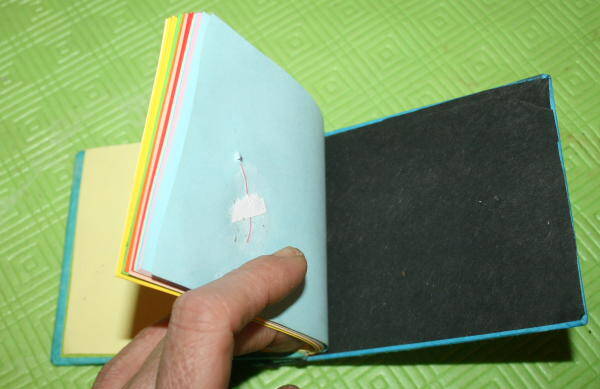
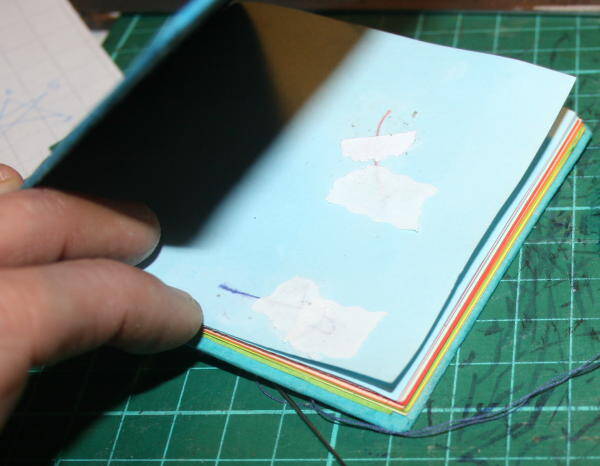
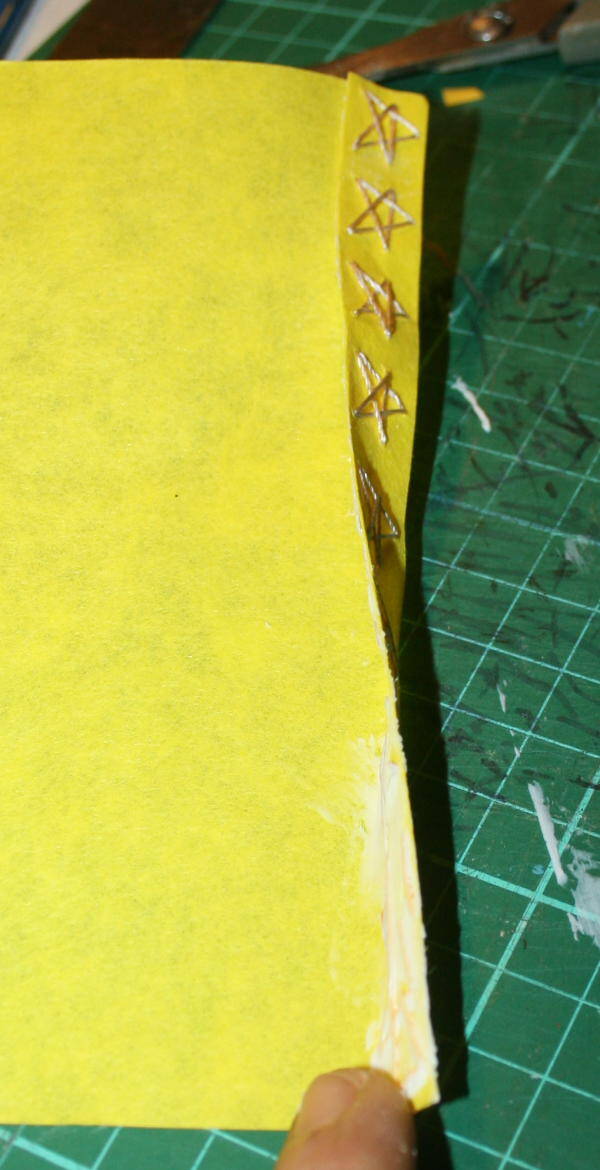
tagliate il filo lasciandone un pezzetto da incollare alla pagina; rinforzate l’incollaggio con dei pezzetti di carta:
![](https://www.lapappadolce.net/wp-content/uploads/2013/01/creare-libri-21.jpg)
![](https://www.lapappadolce.net/wp-content/uploads/2013/01/creare-libri-22.jpg)
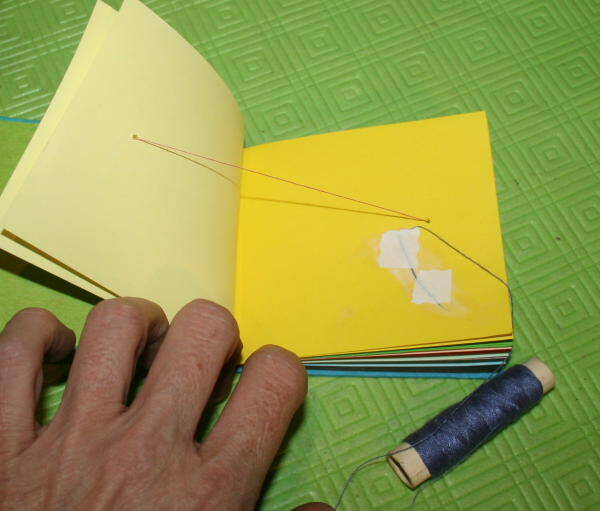
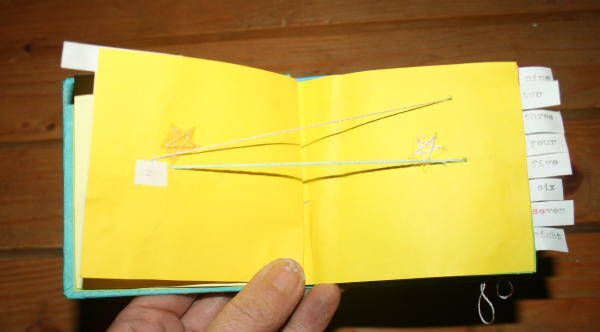
Andate alla prima facciata del secondo colore e fissate il secondo filo ( il filo del numero due)
![](https://www.lapappadolce.net/wp-content/uploads/2013/01/creare-libri-23.jpg)
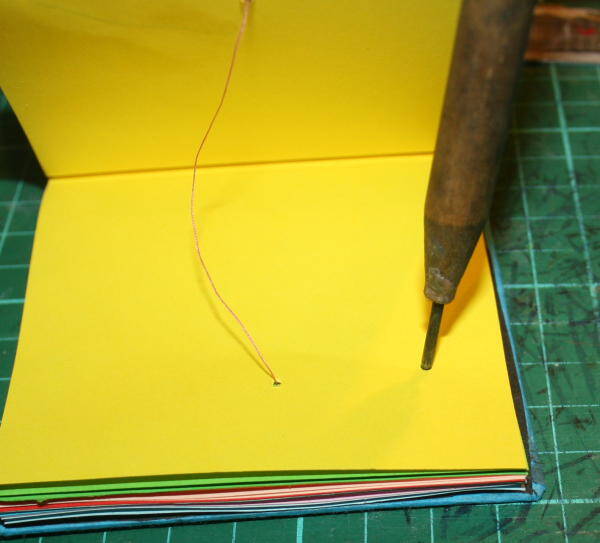
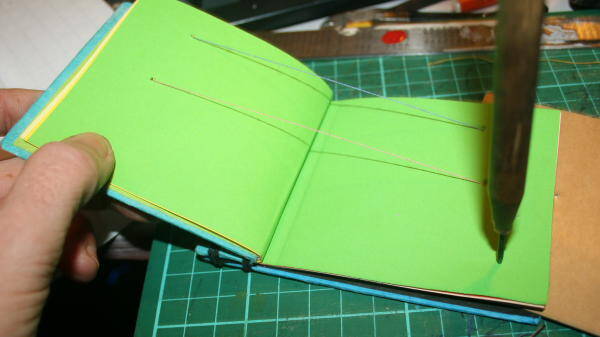
Forate la pagina in un punto diverso da quello fatto per far passare il filo del numero uno, e continuate a forare fino all’ultima pagina:
![](https://www.lapappadolce.net/wp-content/uploads/2013/01/creare-libri-24.jpg)
fate passare il secondo filo attraverso tutti i fori fatti nella seconda posizione, fino all’ultima pagina; arrivati qui fissate con colla e carta il filo alla pagina:
![](https://www.lapappadolce.net/wp-content/uploads/2013/01/creare-libri-25.jpg)
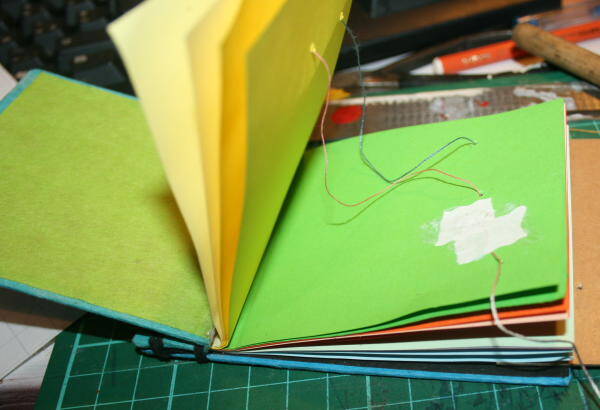
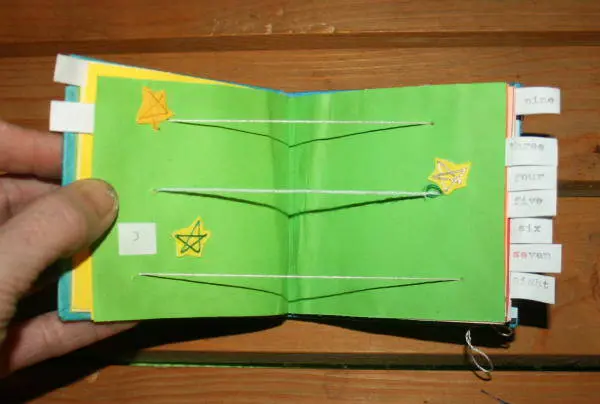
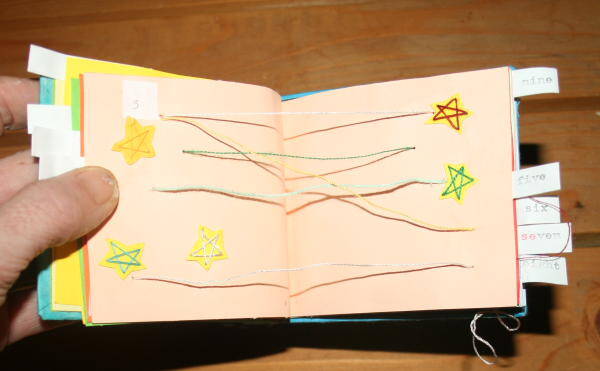
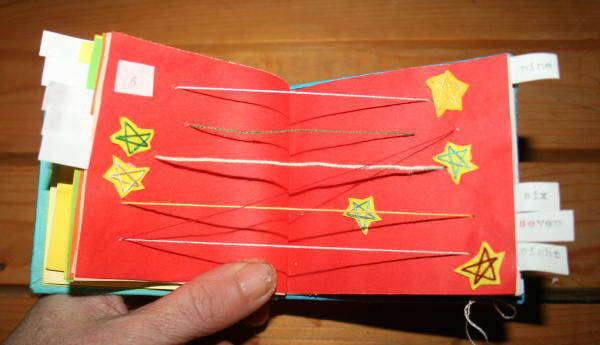
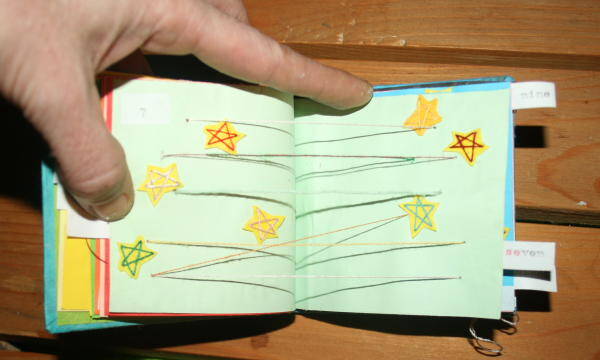
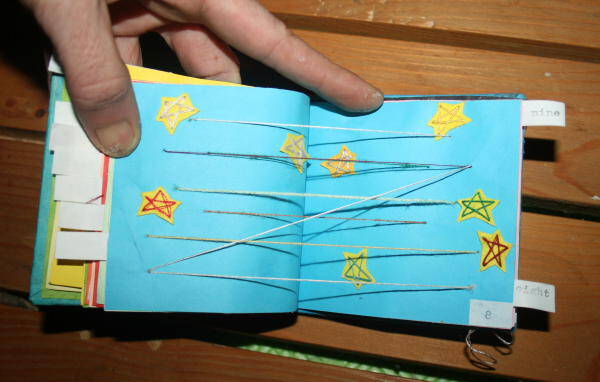
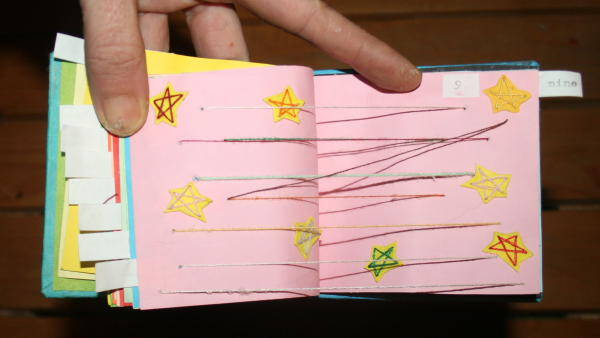
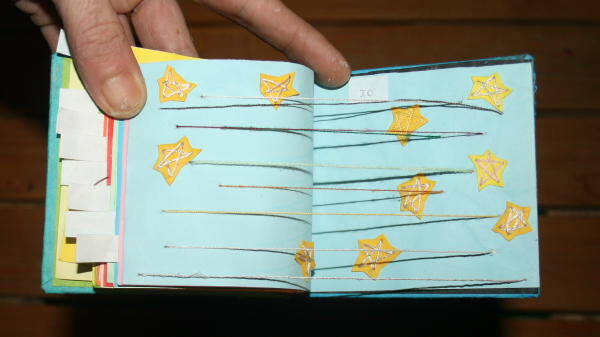
Procedete allo stesso modo per tutte le altre pagine, così:
![](https://www.lapappadolce.net/wp-content/uploads/2013/01/creare-libri-26.jpg)
![](https://www.lapappadolce.net/wp-content/uploads/2013/01/creare-libri-27.jpg)
![](https://www.lapappadolce.net/wp-content/uploads/2013/01/creare-libri-28.jpg)
![](https://www.lapappadolce.net/wp-content/uploads/2013/01/creare-libri-29.jpg)
![](https://www.lapappadolce.net/wp-content/uploads/2013/01/creare-libri-30.jpg)
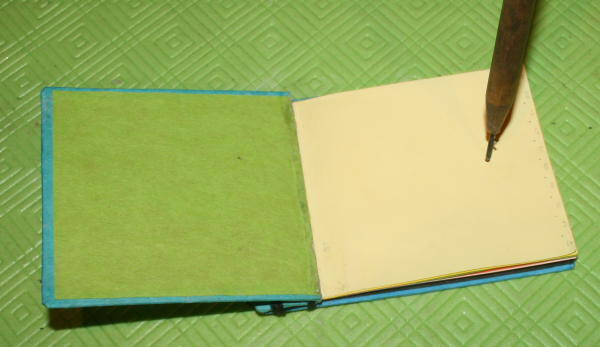
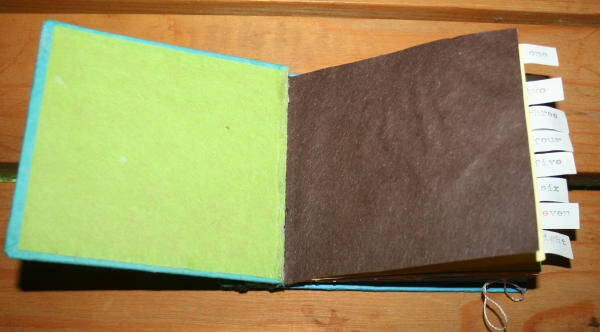
Dopo aver fatto passare il decimo filo nella decima pagina, non resta che coprire con un foglio aggiuntivo la prima facciata, quindi incollare a due a due le altre pagine, e incollare l’ultima pagina alla copertina posteriore del libretto.
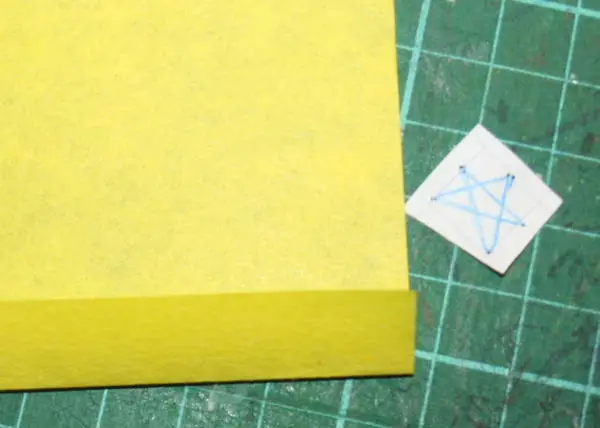
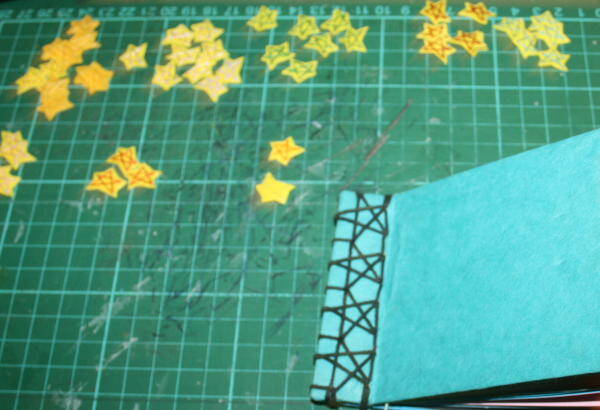
Se volete anche voi decorare il libretto con stelline di carta ricamata, io ho fatto così: ho disegnato una stellina a cinque punte su un foglietto di carta, poi con la punta dell’ago ho riportato i punti della stellina sulla carta gialla messa a doppio:
![](https://www.lapappadolce.net/wp-content/uploads/2013/01/creare-libri-31.jpg)
![](https://www.lapappadolce.net/wp-content/uploads/2013/01/creare-libri-32.jpg)
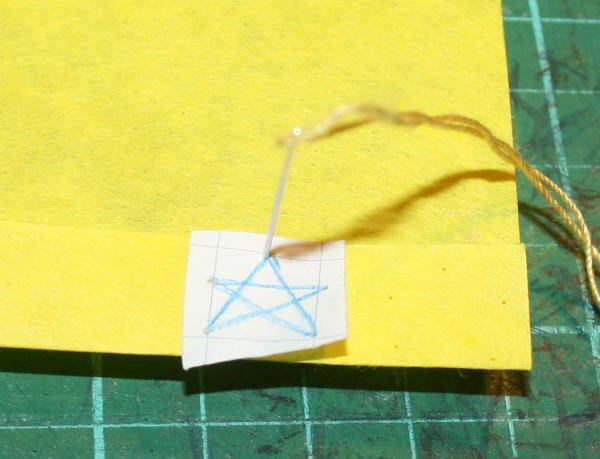
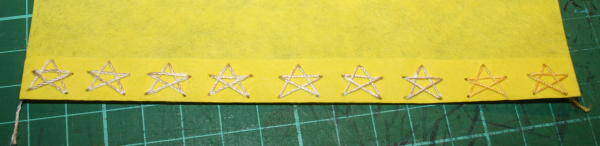
ho ricamato le stelline:
![](https://www.lapappadolce.net/wp-content/uploads/2013/01/creare-libri-33.jpg)
![](https://www.lapappadolce.net/wp-content/uploads/2013/01/creare-libri-34.jpg)
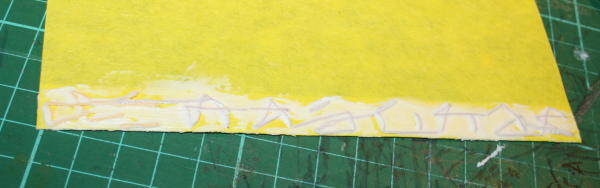
poi ho incollato il retro e ho coperto con altra carta gialla (ripiegando nuovamente il foglio):
![](https://www.lapappadolce.net/wp-content/uploads/2013/01/creare-libri-35.jpg)
![](https://www.lapappadolce.net/wp-content/uploads/2013/01/creare-libri-36.jpg)
e le ho ritagliate:
![creare libri 37](https://www.lapappadolce.net/wp-content/uploads/2013/01/creare-libri-37.jpg)
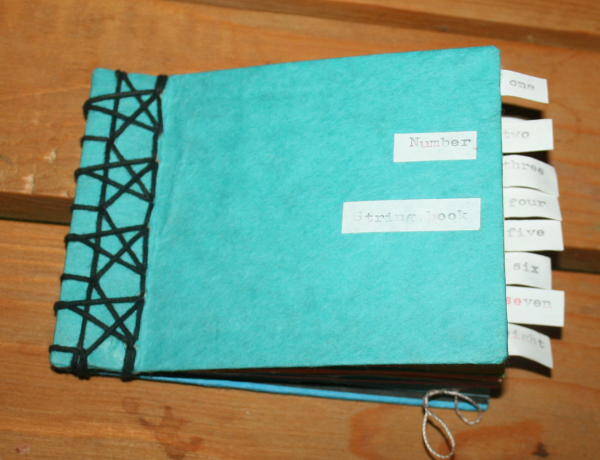
Questo è il libretto ultimato:
![creare libri](https://www.lapappadolce.net/wp-content/uploads/2013/01/creare-libri-38.jpg)
![creare libri](https://www.lapappadolce.net/wp-content/uploads/2013/01/creare-libri-40.jpg)
![creare libri](https://www.lapappadolce.net/wp-content/uploads/2013/01/creare-libri-42.jpg)
![creare libri](https://www.lapappadolce.net/wp-content/uploads/2013/01/creare-libri-43.jpg)
![creare libri](https://www.lapappadolce.net/wp-content/uploads/2013/01/creare-libri-44.jpg)
![creare libri](https://www.lapappadolce.net/wp-content/uploads/2013/01/creare-libri-45.jpg)
![creare libri 46](https://www.lapappadolce.net/wp-content/uploads/2013/01/creare-libri-46.jpg)
![creare libri](https://www.lapappadolce.net/wp-content/uploads/2013/01/creare-libri-47.jpg)
![creare libri](https://www.lapappadolce.net/wp-content/uploads/2013/01/creare-libri-48.jpg)
![creare libri 49](https://www.lapappadolce.net/wp-content/uploads/2013/01/creare-libri-49.jpg)
![creare libri](https://www.lapappadolce.net/wp-content/uploads/2013/01/creare-libri-50.jpg)
![creare libri](https://www.lapappadolce.net/wp-content/uploads/2013/01/creare-libri-51.jpg)
Trovi un altro string book in forma di abaco, con le perline che scorrono sui fili, qui:
![](https://www.lapappadolce.net/wp-content/uploads/2012/05/a-35.jpg)
Book building for children – tutorial to make a book of numbers with Japanese binding and starlets. The book is of the type “string book” on each page increases the number of yarns and stars to count.
At the bottom of the page you can find the links to access the tutorial to make the booklet with Japanese binding, and many other ideas.
![Book building for children - tutorial to make a book of numbers with Japanese binding and starlets Book building for children - tutorial to make a book of numbers with Japanese binding and starlets](https://www.lapappadolce.net/wp-content/uploads/2013/01/creare-libri171.jpg)
Book building for children – tutorial to make a book of numbers with Japanese binding and starlets
Material needed
a booklet consisting of 20 colored pages (pages two and two for color), colored cotton thread, glue and pieces of scrap paper to reinforce the gluing, needle, punch, glue, yellow paper for the stars.
Book building for children – tutorial to make a book of numbers with Japanese binding and starlets
How do you
Drill the first hole from the first to the last page of the book (the thread number one):
![Book building for children - tutorial to make a book of numbers with Japanese binding and starlets](https://www.lapappadolce.net/wp-content/uploads/2013/01/creare-libri-18.jpg)
Insert the thread through the hole of the first page, and stop it with the glue:
![Book building for children - tutorial to make a book of numbers with Japanese binding and starlets](https://www.lapappadolce.net/wp-content/uploads/2013/01/creare-libri-19.jpg)
pass the thread through all the pages of the book, up to the last:
![Book building for children - tutorial to make a book of numbers with Japanese binding and starlets](https://www.lapappadolce.net/wp-content/uploads/2013/01/creare-libri-20.jpg)
cut the thread, leaving a piece to be glued on the page; reinforced bonding with some pieces of paper:
![Book building for children - tutorial to make a book of numbers with Japanese binding and starlets](https://www.lapappadolce.net/wp-content/uploads/2013/01/creare-libri-21.jpg)
![Book building for children - tutorial to make a book of numbers with Japanese binding and starlets](https://www.lapappadolce.net/wp-content/uploads/2013/01/creare-libri-22.jpg)
Go to the first side of the second color and fixed the second thread (the thread of the number two):
![Book building for children - tutorial to make a book of numbers with Japanese binding and starlets](https://www.lapappadolce.net/wp-content/uploads/2013/01/creare-libri-23.jpg)
Drill the page at a different point from the hole made to pass the thread of the number one, and continue to drill up to the last page:
![Book building for children - tutorial to make a book of numbers with Japanese binding and starlets](https://www.lapappadolce.net/wp-content/uploads/2013/01/creare-libri-24.jpg)
pass the second thread through all the holes made in the second position, up to the last page; arrived here fixed with glue and paper the thread on the page:
![Book building for children - tutorial to make a book of numbers with Japanese binding and starlets](https://www.lapappadolce.net/wp-content/uploads/2013/01/creare-libri-25.jpg)
Proceed in the same way for all the other pages, in this way:
![Book building for children - tutorial to make a book of numbers with Japanese binding and starlets](https://www.lapappadolce.net/wp-content/uploads/2013/01/creare-libri-26.jpg)
![Book building for children - tutorial to make a book of numbers with Japanese binding and starlets](https://www.lapappadolce.net/wp-content/uploads/2013/01/creare-libri-27.jpg)
![Book building for children - tutorial to make a book of numbers with Japanese binding and starlets](https://www.lapappadolce.net/wp-content/uploads/2013/01/creare-libri-28.jpg)
![Book building for children - tutorial to make a book of numbers with Japanese binding and starlets](https://www.lapappadolce.net/wp-content/uploads/2013/01/creare-libri-29.jpg)
![Book building for children - tutorial to make a book of numbers with Japanese binding and starlets](https://www.lapappadolce.net/wp-content/uploads/2013/01/creare-libri-30.jpg)
After passing the tenth thread in the tenth page, you just have to cover with an additional sheet the first side, then glue two by two the other pages, and glue the last page to the back cover of the booklet.
If you also want to decorate the book with embroidered paper stars, I did it this way: I drew a star with five points on a piece of paper, then with the needle tip, I reported the points of the starlet on yellow paper putting double:
![Book building for children - tutorial to make a book of numbers with Japanese binding and starlets](https://www.lapappadolce.net/wp-content/uploads/2013/01/creare-libri-31.jpg)
![Book building for children - tutorial to make a book of numbers with Japanese binding and starlets](https://www.lapappadolce.net/wp-content/uploads/2013/01/creare-libri-32.jpg)
I embroidered the stars:
![Book building for children - tutorial to make a book of numbers with Japanese binding and starlets](https://www.lapappadolce.net/wp-content/uploads/2013/01/creare-libri-33.jpg)
![Book building for children - tutorial to make a book of numbers with Japanese binding and starlets](https://www.lapappadolce.net/wp-content/uploads/2013/01/creare-libri-34.jpg)
Then I glued the back and I covered it with another yellow paper (folding the paper again):
![Book building for children - tutorial to make a book of numbers with Japanese binding and starlets](https://www.lapappadolce.net/wp-content/uploads/2013/01/creare-libri-35.jpg)
![Book building for children - tutorial to make a book of numbers with Japanese binding and starlets](https://www.lapappadolce.net/wp-content/uploads/2013/01/creare-libri-36.jpg)
and I cut them:
![Book building for children - tutorial to make a book of numbers with Japanese binding and starlets Book building for children - tutorial to make a book of numbers with Japanese binding and starlets](https://www.lapappadolce.net/wp-content/uploads/2013/01/creare-libri-37.jpg)
This is the finished book:
![Book building for children - tutorial to make a book of numbers with Japanese binding and starlets Book building for children - tutorial to make a book of numbers with Japanese binding and starlets](https://www.lapappadolce.net/wp-content/uploads/2013/01/creare-libri-38.jpg)
![Book building for children - tutorial to make a book of numbers with Japanese binding and starlets Book building for children - tutorial to make a book of numbers with Japanese binding and starlets](https://www.lapappadolce.net/wp-content/uploads/2013/01/creare-libri-40.jpg)
![Book building for children - tutorial to make a book of numbers with Japanese binding and starlets Book building for children - tutorial to make a book of numbers with Japanese binding and starlets](https://www.lapappadolce.net/wp-content/uploads/2013/01/creare-libri-42.jpg)
![Book building for children - tutorial to make a book of numbers with Japanese binding and starlets](https://www.lapappadolce.net/wp-content/uploads/2013/01/creare-libri-43.jpg)
![Book building for children - tutorial to make a book of numbers with Japanese binding and starlets](https://www.lapappadolce.net/wp-content/uploads/2013/01/creare-libri-44.jpg)
![Book building for children - tutorial to make a book of numbers with Japanese binding and starlets Book building for children - tutorial to make a book of numbers with Japanese binding and starlets](https://www.lapappadolce.net/wp-content/uploads/2013/01/creare-libri-45.jpg)
![Book building for children - tutorial to make a book of numbers with Japanese binding and starlets](https://www.lapappadolce.net/wp-content/uploads/2013/01/creare-libri-46.jpg)
![Book building for children - tutorial to make a book of numbers with Japanese binding and starlets](https://www.lapappadolce.net/wp-content/uploads/2013/01/creare-libri-47.jpg)
![Book building for children - tutorial to make a book of numbers with Japanese binding and starlets](https://www.lapappadolce.net/wp-content/uploads/2013/01/creare-libri-48.jpg)
![Book building for children - tutorial to make a book of numbers with Japanese binding and starlets Book building for children - tutorial to make a book of numbers with Japanese binding and starlets](https://www.lapappadolce.net/wp-content/uploads/2013/01/creare-libri-49.jpg)
![Book building for children - tutorial to make a book of numbers with Japanese binding and starlets Book building for children - tutorial to make a book of numbers with Japanese binding and starlets](https://www.lapappadolce.net/wp-content/uploads/2013/01/creare-libri-50.jpg)
![Book building for children - tutorial to make a book of numbers with Japanese binding and starlets](https://www.lapappadolce.net/wp-content/uploads/2013/01/creare-libri-51.jpg)
Another string book here: