Bambola di carta – è uno dei giochi più diffusi vestire e animare le bambole di carta. I bambini, giocando, hanno la possibilità di esercitarsi col ritaglio, il disegno, e di utilizzare la propria abilità di progettazione.
Questa è la bambola:

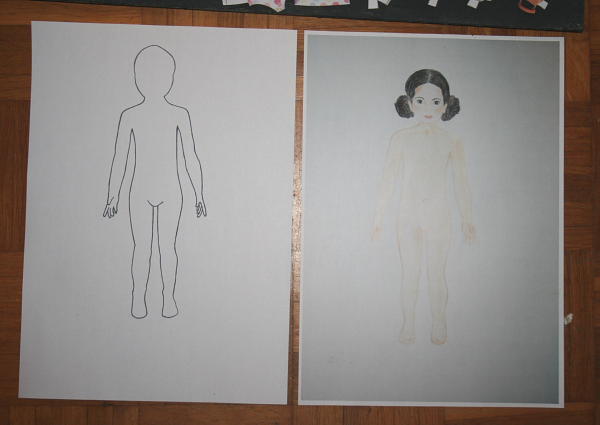
potete scegliere la sagoma da far completare dal bambino, oppure la bambolina pronta. Sono in pdf e pronti per la stampa nella dimensione corretta:
Prima di ritagliarle, consiglio di incollarle ad un cartoncino.
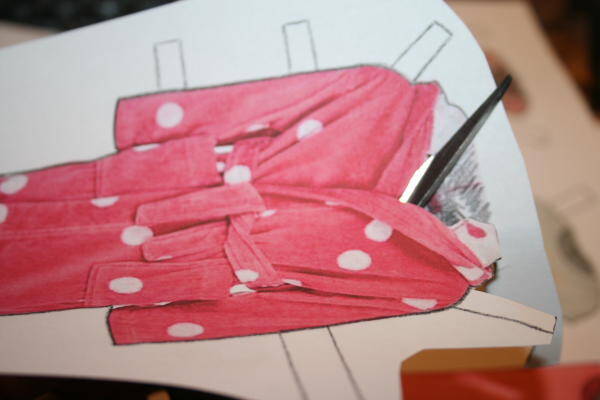
Per queste bamboline, che sono le prime che pubblico, ho scelto la soluzione più classica: vestiti e accessori si applicano piegando le linguette. Esistono però tantissime altre possibilità quali utilizzare piccoli magneti, velcro, incastri di cartone, ecc…
Se desiderate la bambolina può stare anche “in piedi”: basterà disegnare una liguetta intorno ai piedi la base, da ripiegare poi sul retro. Trovate un po’ di idee e links in fondo all’articolo.
Bambola di carta – free download e tutorial
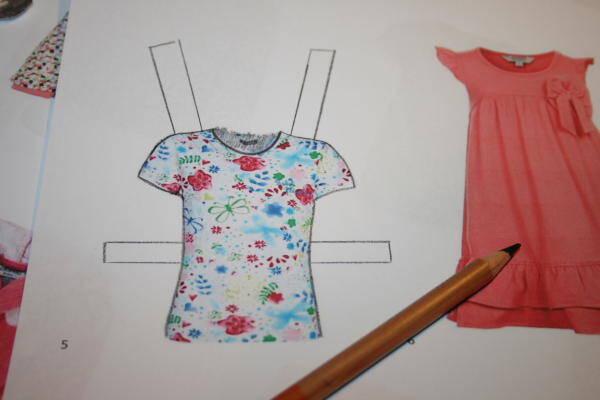
Per iniziare questi elementi:

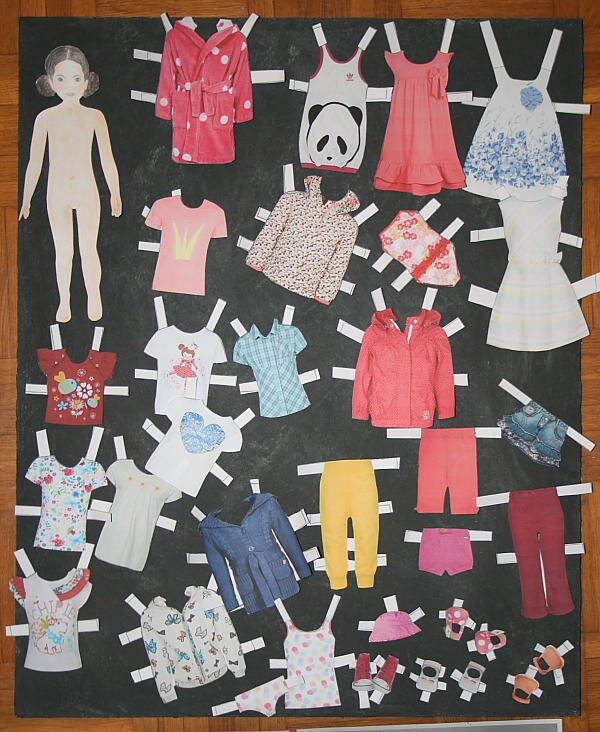
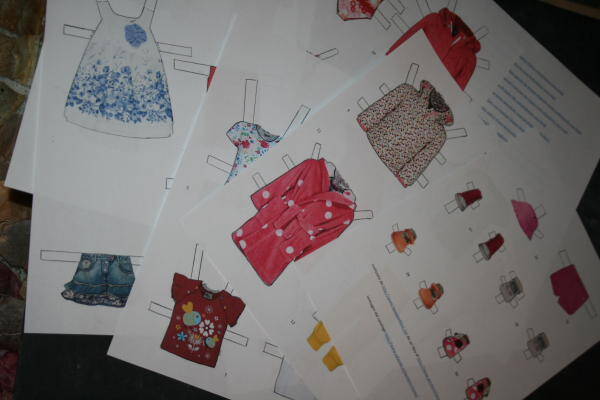
Potete stamparli sia nella versione senza linguette e scollo, sia nella versione già pronta, qui. La dimensione è quella adatta alle misure della mia bambola:
(da far elaborare al bambino e pronti). Nell’ultima pagina di stampa trovate i links ai modelli originali, se può servire.
Io consiglio di stampare la versione da elaborare: la risoluzione delle immagini è leggermente migliore, ma soprattutto il bambino ha la possibilità di progettare e realizzare le linguette perchè possano effettivamente sostenere gli elementi, e adattare ad esempio, lo scollo delle giacche.
(Aprendo entrambi i file, è molto semplice capire come muoversi)

Bambola di carta – free download e tutorial
Seguendo questo semplice tutorial, poi, potrete arricchire il guardaroba della bambola non soltanto con nuovi vestitini disegnati dal bambino, ma anche attingendo a vostra volta al materiale presente in rete.
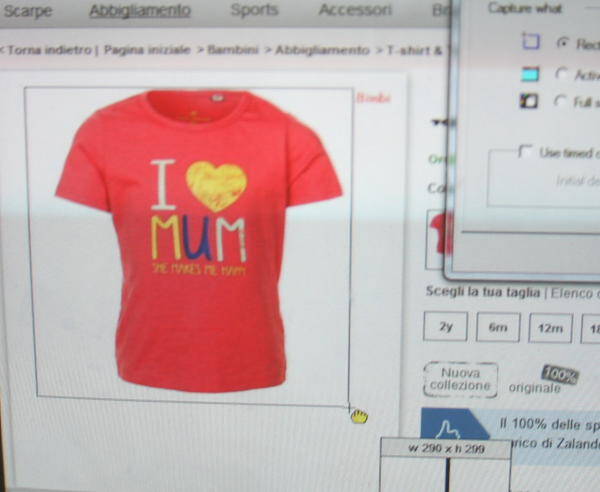
Per prima cosa dovete disporre di una bambolina già ritagliata. Andate quindi al vostro sito preferito:

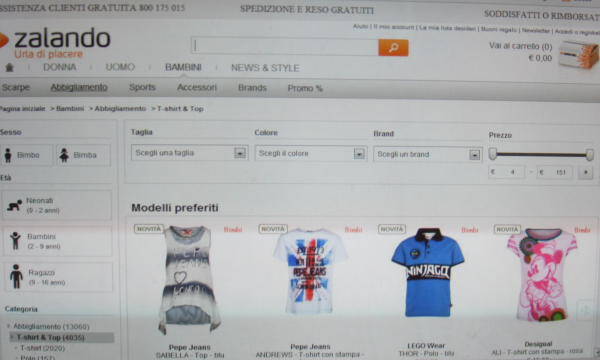
e fate la vostra scelta:

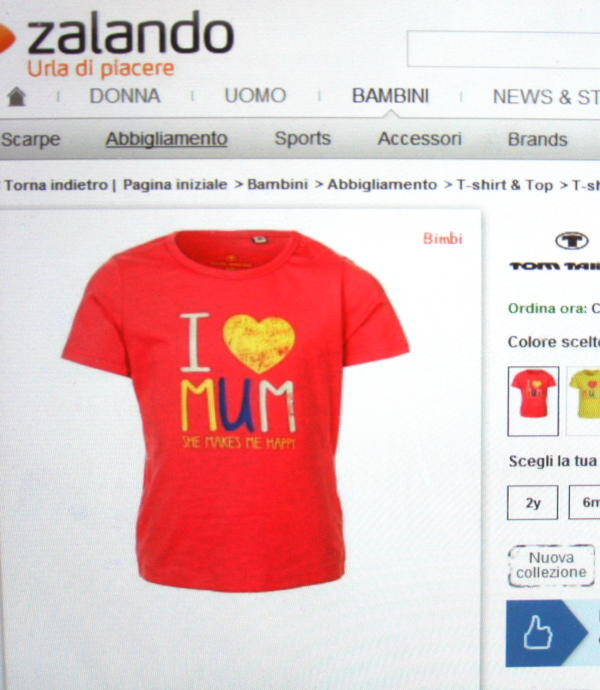
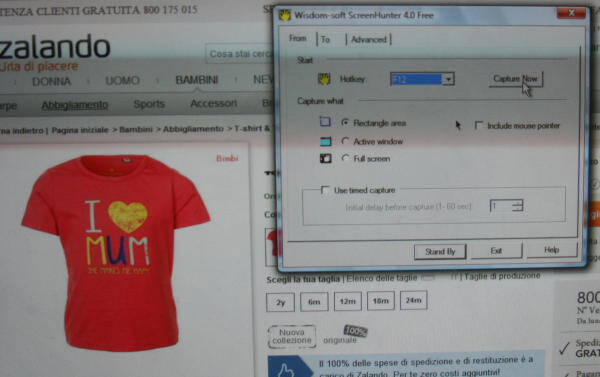
I cataloghi online non permettono di solito di salvare le immagini sul computer utilizzando il pulsante destro del mouse, e questo è il caso. Il problema si risolve utilizzando un programma “cattura schermate” (io utilizzo Screen Hunter, gratuito, ma ne esistono moltissimi altri):


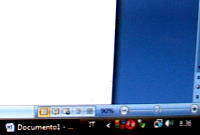
Una volta salvata l’immagine, apriamo Word


e, molto importante per il raffronto con la bambolina che ho preparato io, selezionate in basso a destra uno zoom al 90%

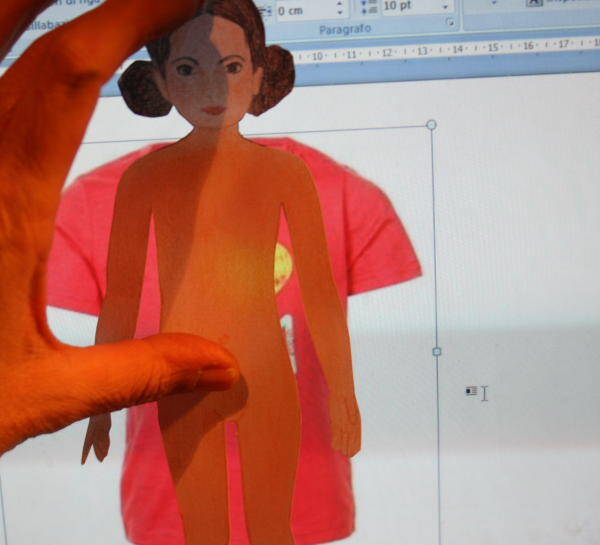
Ora posizionate la bambolina ritagliata sullo schermo, e riducete l’immagine in modo che si adatti il più possibile alle sue dimensioni (basta trascinare i margini col mouse):


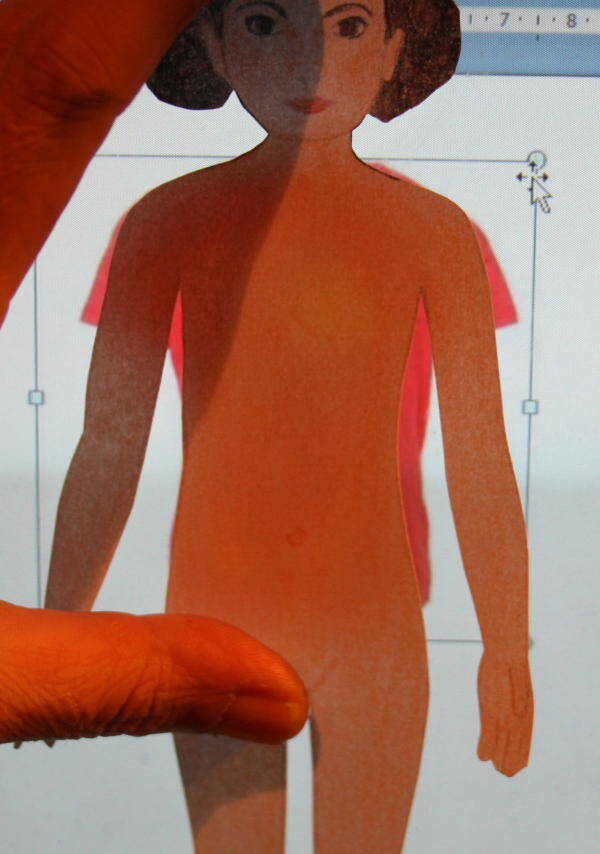
ed è fatta… non resta che stampare, aggiungere linguette e altri eventuali accorgimenti, ritagliare e giocare:


Nei prossimi giorni prepareremo insieme una casetta-libro per la bambolina e tutti i suoi vestitini.
Bambola di carta – free download e tutorial
Come detto all’inizio, la bambola di carta può essere ritagliata e montata in vari modi, qui alcuni links ad altri articoli che parlano di bambole di carta nel web:
– una bambola di carta con arti snodati, di http://www.handmadecharlotte.com/diy-articulated-paper-dolls/
– un esempio di bambola di carta con “piedistallo”, di http://familycrafts.about.com/od/paperdolls/ig/Paper-Doll-Shirts/
– le bambole di carta “magnetiche” di http://leesyslife.blogspot.it/2012/04/myo-magnetic-dolls.html