

Fare la carta coi bambini – cenni storici sulla fabbricazione della carta, attrezzatura di base e consigli generali per iniziare a fare la carta coi bambini, a casa e a scuola. L’argomento rientra nel quadro della quarta lezione cosmica Montessori (storia della scrittura)
Cenni storici
L’antenato più importante della carta è il papiro, che è stato utilizzato dagli Egizi per la scrittura geroglifica già nel 2000 aC. Il papiro veniva prodotto a partire dalla polpa interna dello stelo del papiro, una pianta semi acquatica. La polpa veniva tagliata in sottili striscioline che venivano poi bagnate, appaiate a formare un foglio in due strati, quindi pressate ed infine essiccate al sole.

Il papiro, a partire dall’Egitto, si diffuse anche presso Ebrei, Babilonesi, e anche in tutto il mondo greco-romano.
Prima dell’invenzione della carta erano diffusi anche altri materiali alternativi al papiro, quali fogli scrivibili ricavati dalla corteccia o dal fusto di alcuni alberi, strisce di bambù, foglie, tessuti, e da pelli di animali (pergamena e cartapecora).


L’invenzione della carta si deve a Ts’ai Lun, funzionario dell’imperatore cinese Ho Ti, ed avvenne nel II secolo aC. Ts’ai Lun scoprì che era possibile macerare e ridurre in pasta materiali fibrosi quali stracci di cotone, residui delle reti da pesca, piante quali canapa e gelso. Quello che otteneva raccogliendo la pasta su un tessuto di lana teso, in modo che asciugasse, era appunto un foglio di carta.
L’invenzione si diffuse rapidamente in tutta la Cina, e la tecnica si perfezionò sempre di più. Per molti secoli i Cinesi custodirono gelosamente il segreto della fabbricazione della carta, ma ad un certo punto questa arte raggiunse il Giappone. Per la diffusione della carta in Occidente, invece, dobbiamo aspettare fino al VIII secolo. Quando gli arabi, infatti, conquistarono la Persia, gli abili maestri cartai Cinesi svelarono ai vincitori la loro arte, che da qui venne divulgata in India, Egitto, Palestina, per poi raggiungere la Spagna e il resto dell’Europa intorno al 1150.
In Europa la carta non ebbe fortuna immediata, perchè la carta proveniente da Oriente era molto assorbente e poco adatta alla scrittura con la penna d’oca. Per questo venne introdotta una variante di fabbricazione: per la pasta si utilizzarono solo stracci di cotone, lino e canapa, e una volta asciutti i fogli venivano trattati con una gelatina ricavata dalle ossa di vari animali, per renderli opachi e impermeabili.
La carta divenne sempre più importante in Occidente, fino alla sua completa affermazione come materiale d’uso quotidiano nel Rinascimento, grazie al grande fiorire di opere letterarie ed all’invenzione della stampa con caratteri mobili.
Sorsero cartiere in tutta Europa, e salvo pochi particolari, la fabbricazione della carta non differiva di molto da quella orientale. Invece erano diverse le materie prime impiegate: in Europa alle fibre vegetali si preferirono gli stracci.
Attrezzatura e materiali di base per iniziare a fare la carta riciclata

Tutto quello che serve per produrre fogli di carta riciclata coi bambini, è facilmente reperibile in casa, senza dover sostenere spese.
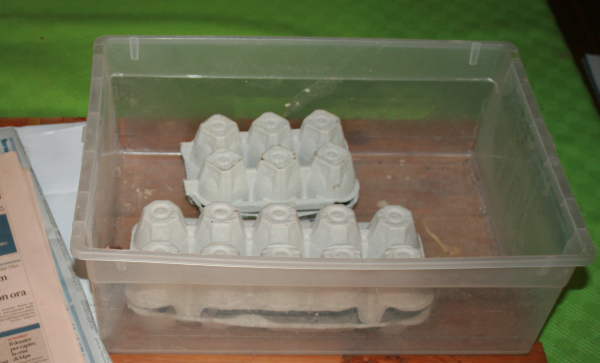
Vaschetta per macerare la carta di recupero o gli elementi vegetali che desideriamo, possiamo utilizzare qualsiasi secchio di carta, mentre quando poi si tratterà di raccoglierla con lo stampo, bisognerà avere a disposizione una vaschetta rettangolare di dimensione superiore appunto a quelle dello stampo

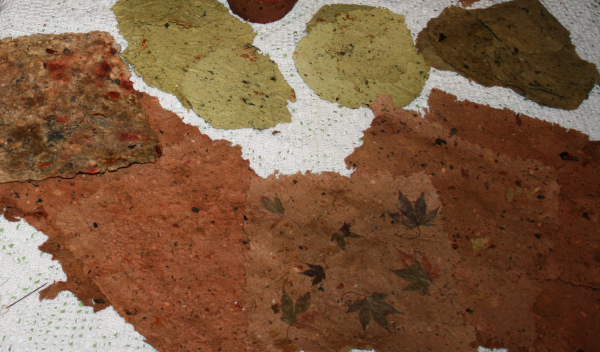
Carta di recupero è possibile riciclare qualsiasi tipo di carta, ma le più indicate sono: carta da fotocopie e stampante, fogli di quaderno e simili, sacchetti e carta da imballo marrone, cartoni delle uova, cartoncino carta e carta velina colorata, carta da acquarello. Possiamo usare anche la carta di giornale, ma in piccole quantità, perchè si tratta di una carta spesso trattata con acidi e con un’elevata quantità di inchiostro.
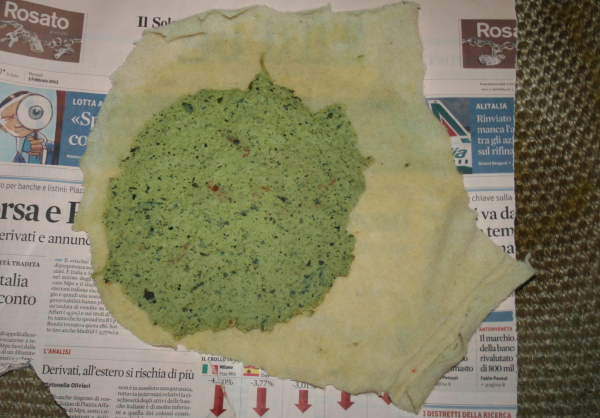
Fibre vegetali possiamo utilizzare molti vegetali nella fabbricazione della carta. Tra quelli a fibra lunga i più adatti sono gli asparagi, le giunchiglie, i gambi di molti fiori a bulbo (ad esempio narcisi), il rabarbaro, il sedano, gli spinaci. I vegetali possono essere utilizzati sia freschi sia secchi. Tutte queste fibre si frantumano facendole bollire in abbondante acqua. Altri vegetali, invece, richiedono trattamenti chimici (di solito si utilizza carbonato di sodio). Come per la carta, anche le fibre vegetali devono essere fatte macerare , in modo da favorire la liberazione della cellulosa. Il sistema più efficace è quello di pestarle, dopo la bollitura, con un mattarello. L’operazione richiede circa venti minuti, ma considerate che più le fibre saranno macerate, migliore sarà la qualità della carta.
Ortaggi e altri vegetali per effetti speciali bucce di cipolla, melanzana, alghe alimentari e altri ortaggi e vegetali utilizzati in aggiunta alla carta di recupero, non hanno bisogno di essere “pestati”, mentre la bollitura è facoltativa, e dipende dall’effetto che volete ottenere. Le bucce di cipolla sono in genere le più apprezzate. Possiamo aggiungerle secche ad un impasto “misto”, oppure possiamo utilizzarle, previa bollitura, in aggiunta alla carta di recupero bianca.
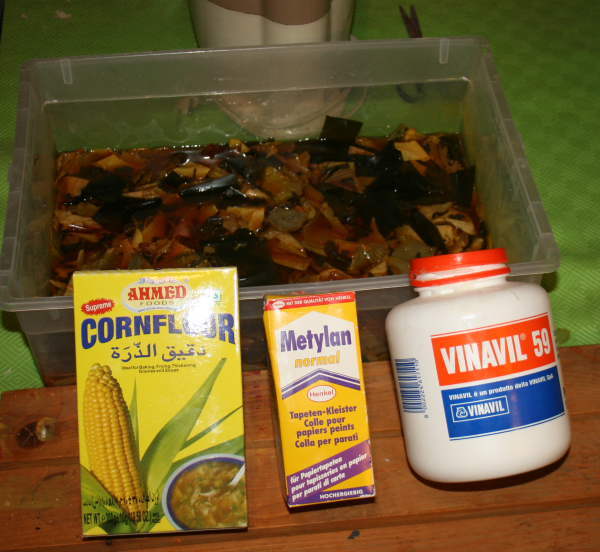
Colla vinilica o altri collanti aggiungere all’impasto una piccola quantità di colla vinilica può essere molto utile, soprattutto per i primi esperimenti di fabbricazione della carta a mano, perchè aumenta la probabilità di successo e consente di ottenere carte meno assorbenti e più adatte a ricevere la scrittura. Possiamo anche usare colla da parati in polvere, o anche aggiungere all’impasto dell’amido di mais e un bicchierino di aceto.
Frullatore elettrico serve ad ottenere la pasta dalla carta macerata.
Mestoli e contenitori per travasare
Colino è utile per filtrare la pasta o le fibre vegetali (a freddo o dopo la bollitura)
Guanti
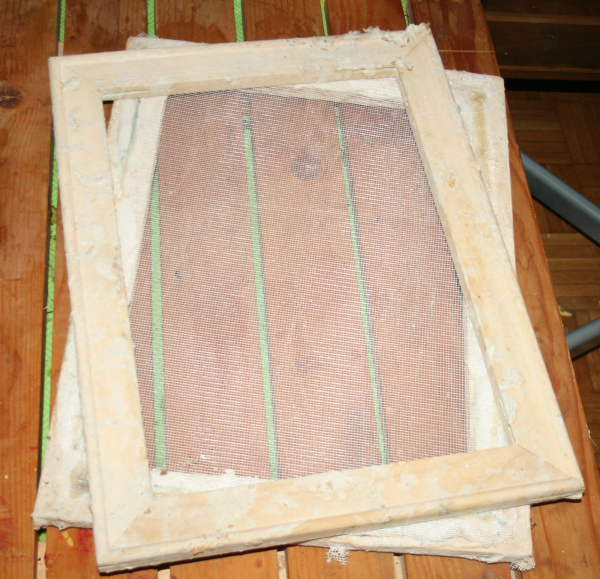
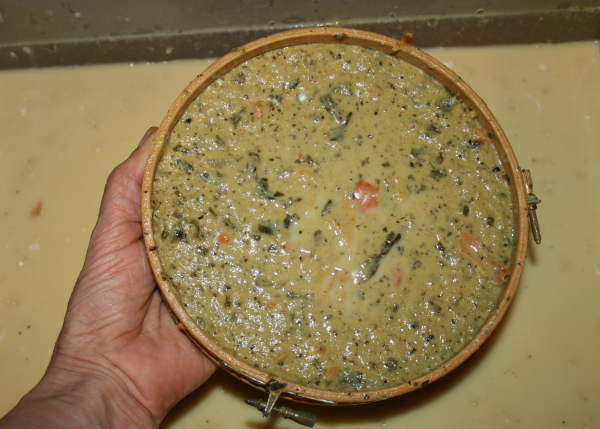
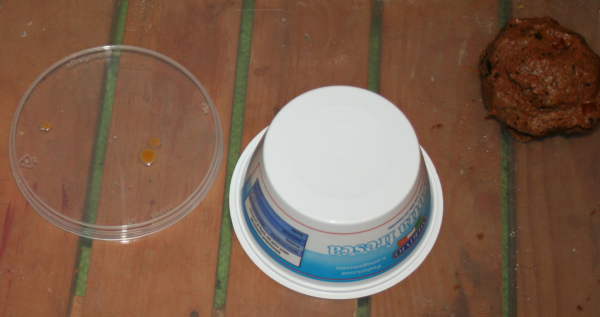
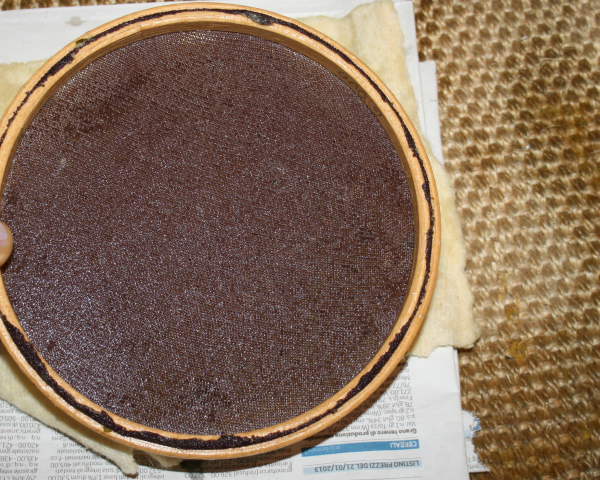
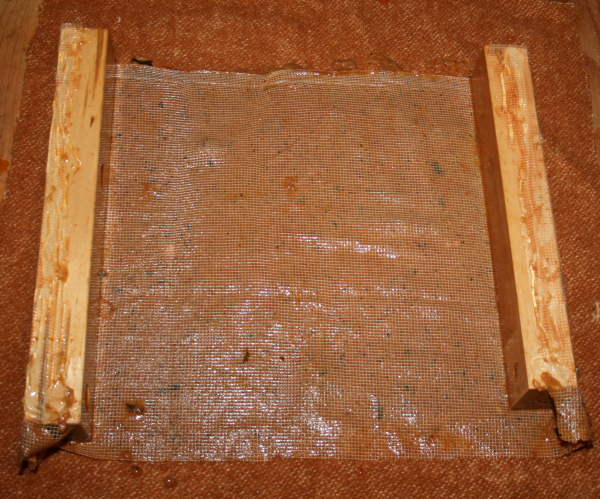
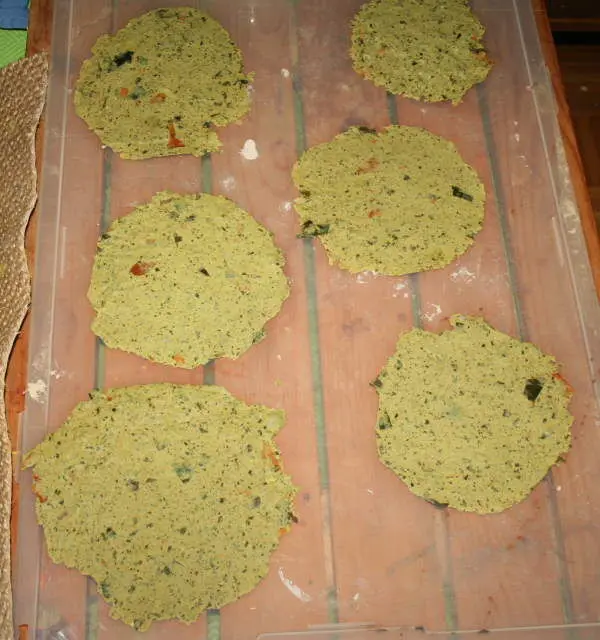
Cascio e stampo si tratta di due pezzi separati. Lo stampo è una cornice di legno alla quale è applicata una retina. Il cascio è una seconda cornice, identica alla precedente, ma senza retina. L’altezza del cascio può determinare lo spessore del foglio, e sicuramente ne determina la forma. Si utilizzano insieme: il cascio viene posizionato sullo stampo, tenendo la retina rivolta verso l’alto. Dopo averli immersi nella vaschetta, cascio e stampo vengono sollevati insieme, in modo che l’eccesso di acqua goccioli attraverso la rete, che tratterrà invece la pasta. I tipici margini irregolari della carta fatta a mano dipendono proprio dal fatto che picccole quantità di pasta filtrano attraverso la fessura tra lo stampo e il cascio.
Questo è un esempio di stampo in commercio (formato A4, costo 8,40):

Il costo come vedete non è eccessivo, ma può diventare impegnativo se vogliamo portare l’attività a scuola; prima di rinunciare all’idea, considerate che realizzare stampo e cascio in proprio è molto semplice e davvero economico: per la retina possiamo utilizzare pezzi di zanzariera, tulle, una calza di nylon, retine metalliche, ecc… i telai si possono realizzare facilmente anche con listelli di legno di recupero (magari organizzando un mini-laboratorio di falegnameria coi bambini), inoltre si può fare della bellissima carta a mano anche utilizzando solo lo stampo (senza cascio), e spesso all’IKEA si trovano cornici di legno o plastica molto economiche ed adattissime allo scopo.


Con i bambini è consigliabile predisporre stampi di piccole dimensioni, ad esempio si possono usare con successo i telai da ricamo:

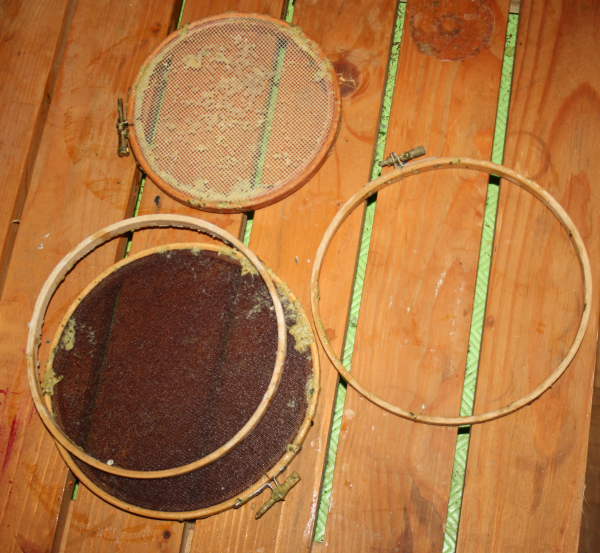
Ancora più e economica, e facilmente realizzabile anche dai bambini, è questa soluzione:


Naturalmente, a seconda del tipo di rete scelta, l’effetto finale può variare anche di molto. Con le reti metalliche si ottengono fogli vergati, mentre con le reti in tessuto i fogli risultano più lisci e uniformi.
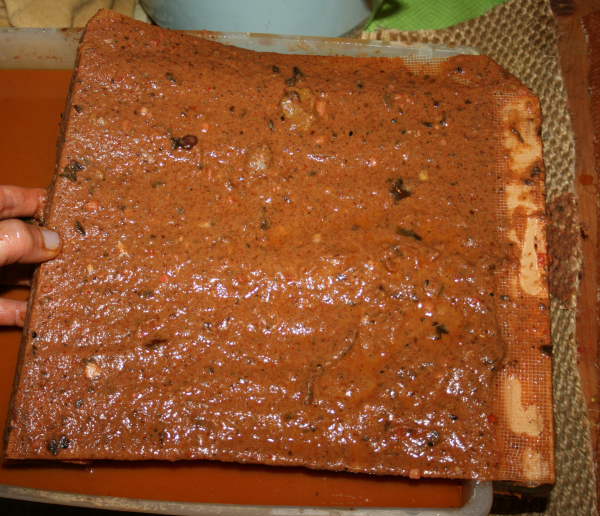
Pezze e strofinacci una volta pronto, ogni foglio prodotto deve essere trasferito dallo stampo su un pezzo di tessuto umido (meglio se di lana). Queste pezze servono da supporto per la carta, ed assorbono l’acqua in eccesso. Si possono ricavare da vecchie maglie e coperte, ma si possono utilizzare anche strofinacci di spugna sintetica da cucina e asciugamani.
Fogli di giornale sono molto utili per assorbire l’acqua durante la pressatura, e per proteggere il piano di lavoro
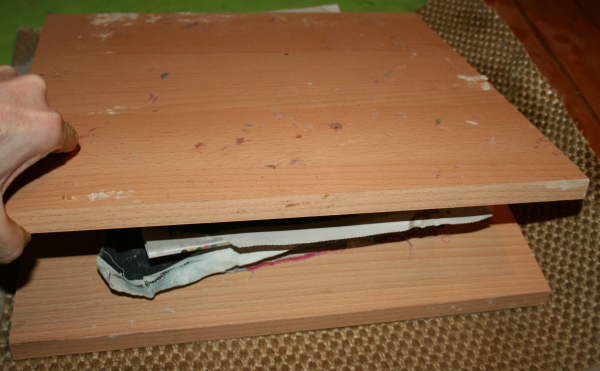
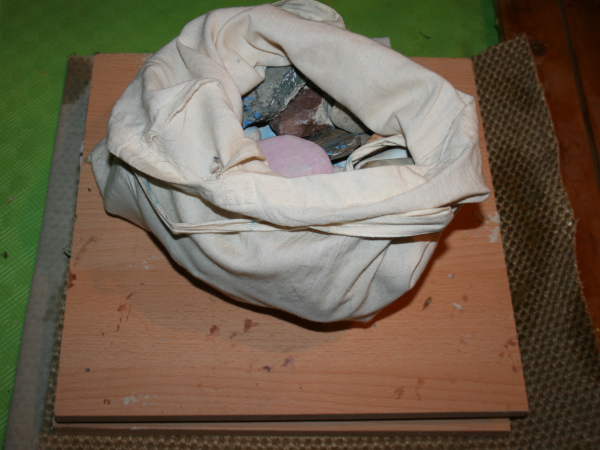
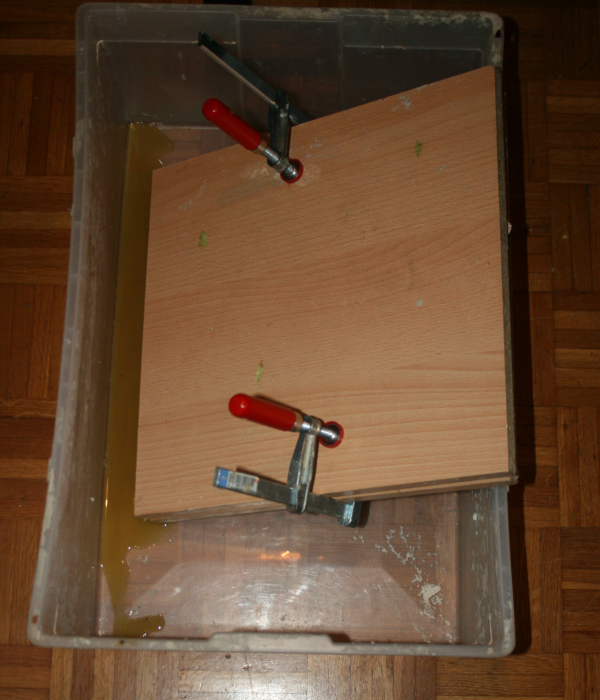
Tavolette per pressare e morsetti formata la pila, i fogli vanno pressati per eliminare la maggior quantità di acqua possibile e favorire l’adesione delle fibre tra loro. La pila di fogli viene quindi posta tra due tavole di legno, bloccate poi con morsetti ed eventualmente pesi (ad esempio un bel sacchetto pieno di sassi). Il principio è semplicimente che i nostri fogli hanno bisogno di essere pressati, per cui invece dei morsetti possiamo anche usare ad esempio pile di mattoni o simili, aumentando gradualmente il peso.


Consigli generali per la fabbricazione della carta – tecnica di base
1. preparazione della pasta di carta riciclata: stappate la carta in piccoli pezzetti (operazione che piace molto ai bambini),

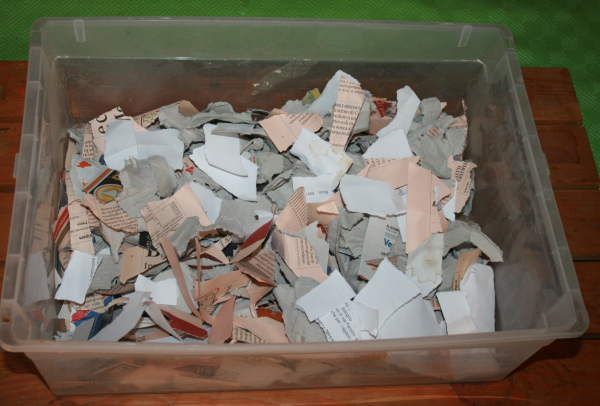
coprite con acqua

aggiungete eventualmente coloranti, vegetali, ecc…


e, se desiderate, i collanti scelti
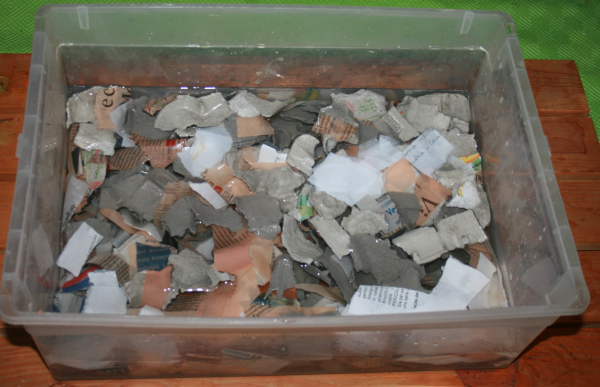
Lasciate a macerare per una notte: questo semplifica notevolmente la preparazione della pasta. Se la carta è molta, è consigliabile utilizzare acqua calda.
Il giorno seguente frullate i materiali macerati,

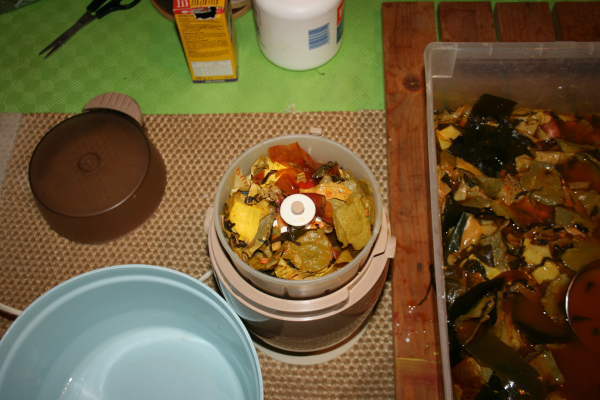
ed avrete ottenuto la vostra pasta base.
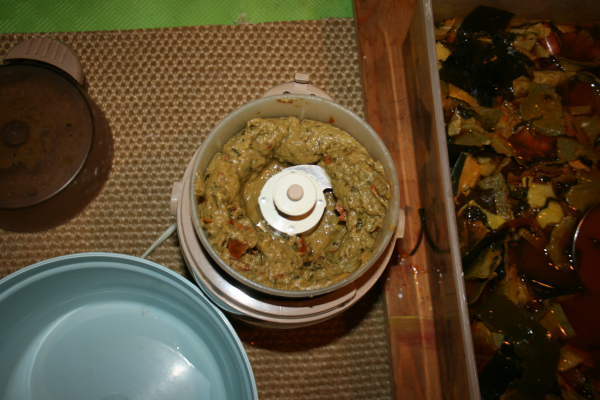
Si consiglia di frullare piccole quantità per volta, a intermittenza, e per non più di 10 secondi. Non bisogna sminuzzare eccessivamente le fibre, altrimenti avremo fogli molto fragili e poco compatti.
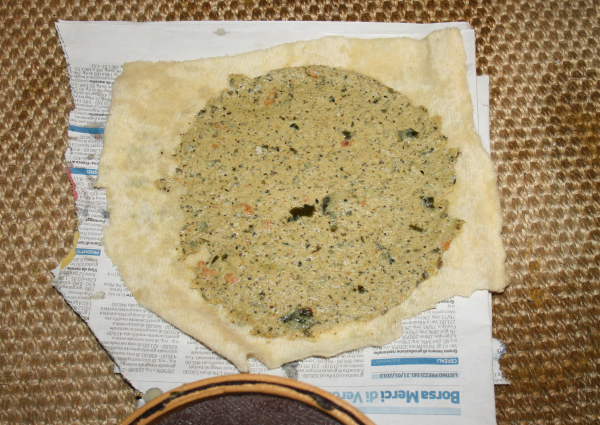
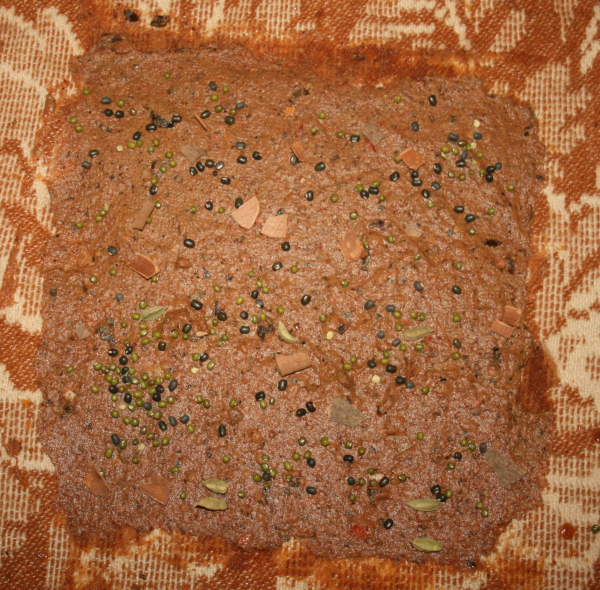
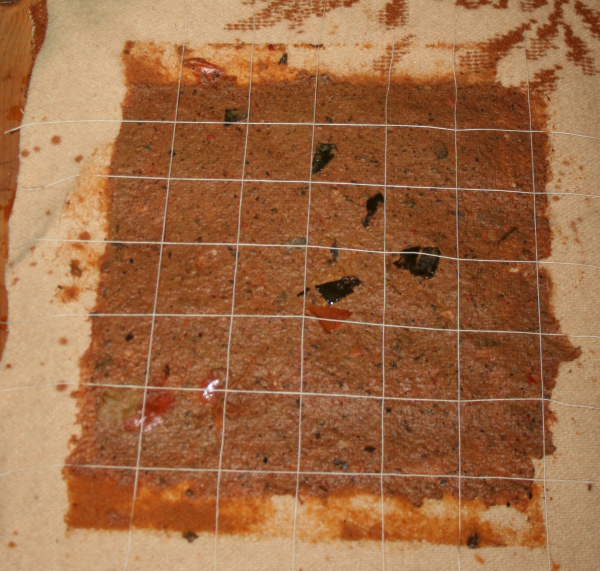
Alla pasta base potrete poi aggiungere, se desiderate, altri elementi decorativi quali semini, fiori essiccati, foglie, erbe varie, pagliuzze, fili di seta, e tutto ciò che suggerisce la vostra fantasia.
Se al contrario volete ottenere carta il più possibile chiara, prima di frullare risciacquate la carta macerata in un colino o uno scolapasta con abbondante acqua fredda, in modo da eliminare i residui di inchiostro e gli eventuali additivi presenti nella carta.
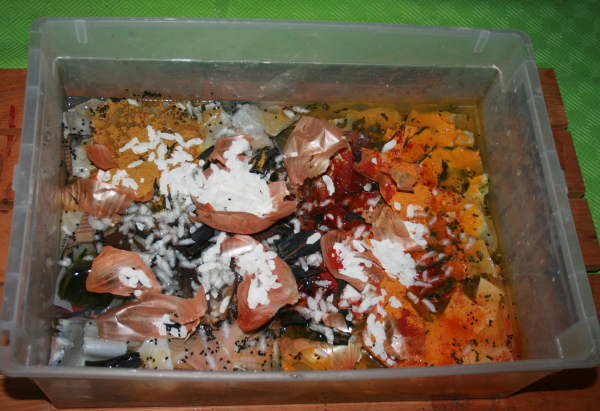
1. preparazione della pasta “velo di cipolla”
– mettete a macerare carta di recupero esclusivamente bianca
– pelate alcune cipolle, tagliate le bucce in pezzetti abbastanza piccoli e mettete in una casseruola con acqua. Fate bollire a fuoco basso per circa 40 minuti. Le bucce di cipolla sono un noto colorante naturale, e vedrete osservando l’acqua di bollitura.
– frullate insieme la carta bianca macerata e le bucce bollite, aggiungendo l’acqua di bollitura, che servirà a tingere di un bel colore ambrato la vostra carta
1. preparazione della pasta di fibre vegetali (senza aggiunta di carta di recupero). Come già detto, possiamo realizzare bellissime carte fatte a mano utilizzando spinaci, sedano, rabarbaro, giunchiglie e gambi di fiori a bulbo (narcisi, giacinti ecc…) Con un po’ di pratica si impara a scegliere i materiali più adatti, anche in funzione del risultato che vogliamo ottenere. La procedura è questa:
– tagliare i gambi in pezzi lunghi circa 7 cm
– mettere in un pentolino, aggiungere eventualmente fiori e foglie della pianta scelta, coprire con acqua e portare ad ebollizione. Abbassare poi la fiamma e bar bollire per almeno 30 minuti
– togliere dal fuoco e ridurre i gambi in pezzi (indossando guanti di gomma). Se le fibre si separano facilmente, significa che sono pronte, mentre se i gambi sono ancora compatti occorrerà rimettere a bollire ancora un po’
– quando le fibre sono pronte, scolare e risciacquare sotto acqua corrente, in un colino. L’acqua di bollitura può invece servire come colorante, e conservata a parte
– per ridurre le fibre in poltiglia si sconsiglia l’uso del frullatore, perchè è molto importante non rompere troppo le fibre. Meglio quindi metterle su un tagliare di legno o in un mortaio e pestarle ripetutamente con un mattarello. Questa operazione è la più importante e più le fibre saranno lavorate, migliore risulterà la qualità della carta.
– per verificare se abbiamo fatto un buon lavoro possiamo provare ad immergere un pugno di fibre in un bicchiere d’acqua: se mescolando si amalgamano perfettamente, possiamo essere soddisfatti, mentre se tendono a depositarsi sul fondo, dobbiamo pestarle ancora un po’
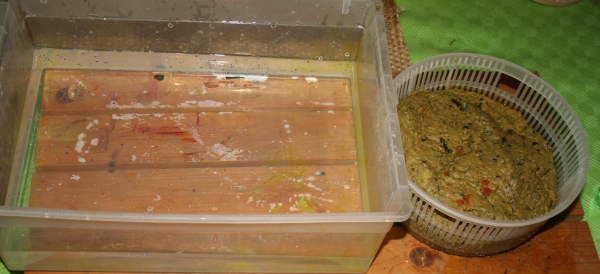
2. preparazione del bagno: versate la pasta nella vaschetta piena d’acqua (il rapporto ottimale è una parte di pasta e quattro di acqua), considerando che quanto più l’impasto è concentrato, tanto più spessa risulterà la carta.


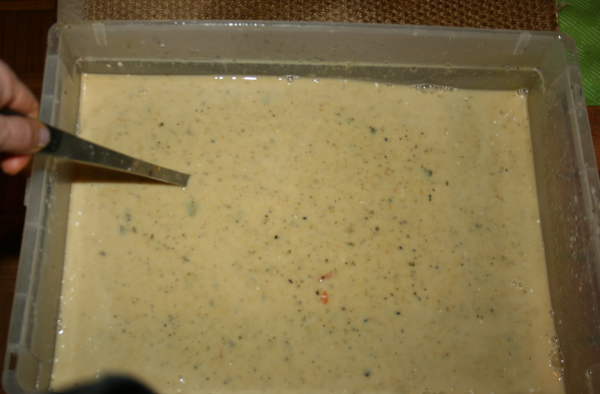
Durante la fabbricazione dei fogli ricordare di mescolare di tanto in tanto per distribuire uniformemente le fibre che altrimenti tendono a depositarsi sul fondo.
3. preparazione dei fogli:
– bagnate la rete dello stampo in modo che l’impasto possa sgocciolare più facilmente.
– poi posizionate il cascio sulla cornice dello stampo (con la retina rivolta verso l’alto)


e, tenendo saldamente uniti i due pezzi, immergete nella vaschetta e muovete lentamente per raccogliere la pasta sulla rete in modo uniforme.
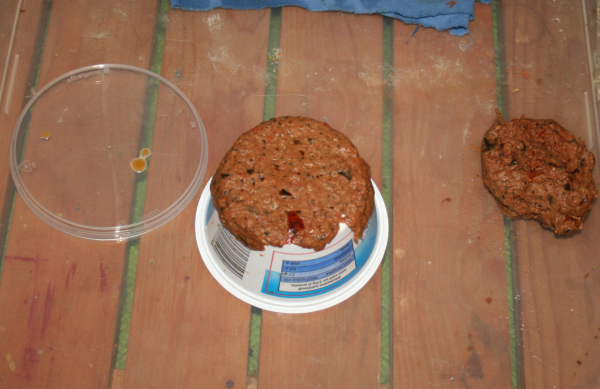
– estraete e lasciate sgocciolare, tenendo i due pezzi in posizione orizzontale.

– quando la maggior parte dell’acqua è scivolata via, scuotete più volte per favorire l’adesione delle fibre.
– rimuovete il cascio con molta attenzione
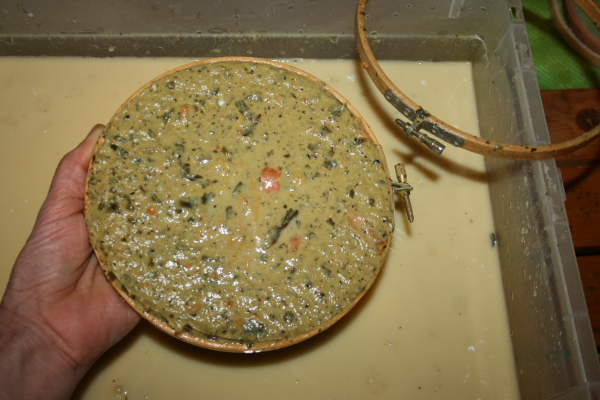


– (con i bambini possiamo anche non usare il cascio e raccogliere la pasta con il solo stampo: in questo caso, semplicemente, otterremo fogli dai margini meno uniformi)

– se alla fine del lavoro avanza della pasta, dopo averla filtrata con un colino potete conservarla in un recipiente chiuso, per circa tre settimane… non versatela mai nel lavandino: potrebbe ostruire i tubi! Piuttosto filtrate e gettate in pattumiera. La pasta, poi, può anche essere usata come pasta da modellare per realizzare ciotoline, perle, ecc…


4. preparazione della pila di fogli
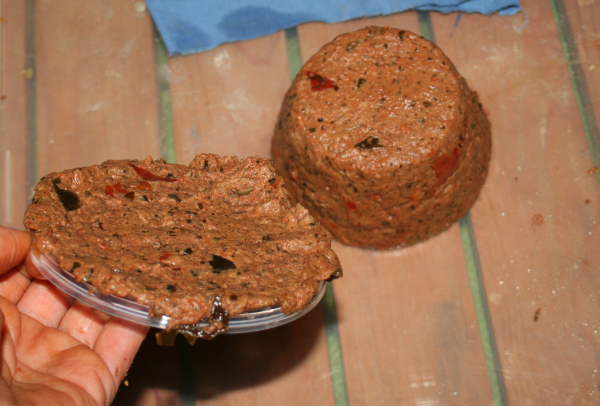
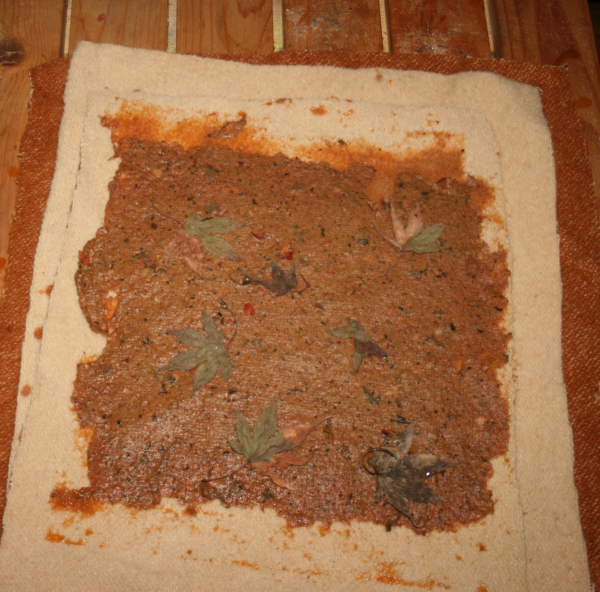
– fatto un foglio, va trasferito sulle pezze umide (non bagnate) per l’asciugatura e la pressatura.


– trasferito il foglio sulla pezza, potete aggiungere eventuali altri elementi decorativi. Al termine coprite con una seconda pezza e qualche foglio di giornale, quindi procedete allo stesso modo con i fogli successivi.


5. pressatura
– la pila di carta e pezze va messa sotto pressione per eliminare l’acqua e favorire l’adesione delle fibre tra loro.

– sia che usiate tavole e morsetti, sia che usate tavole e pesi, la pressione va aumentata gradualmente, man mano che l’acqua in eccesso viene eliminata


– per eliminare la maggior parte dell’acqua occorre circa mezz’ora
– la quantità di acqua eliminata durante la pressatura può essere molta, per cui si consiglia di fare questa operazione all’aperto, se possibile, oppure di proteggere adeguatamente il piano di lavoro con uno spesso strato di stracci assorbenti
6. asciugatura
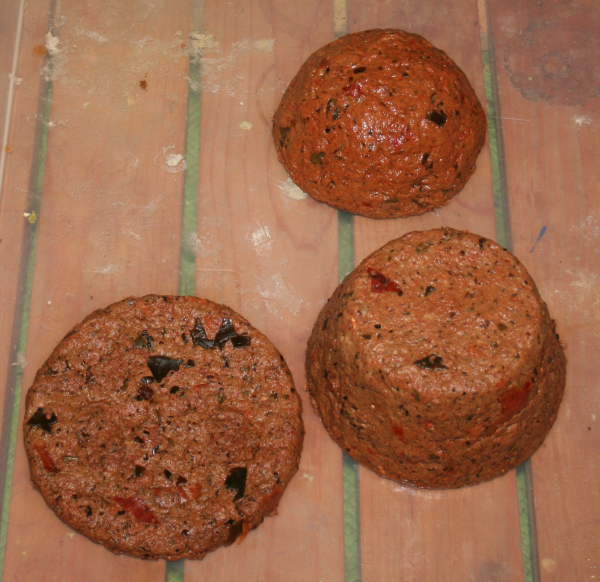
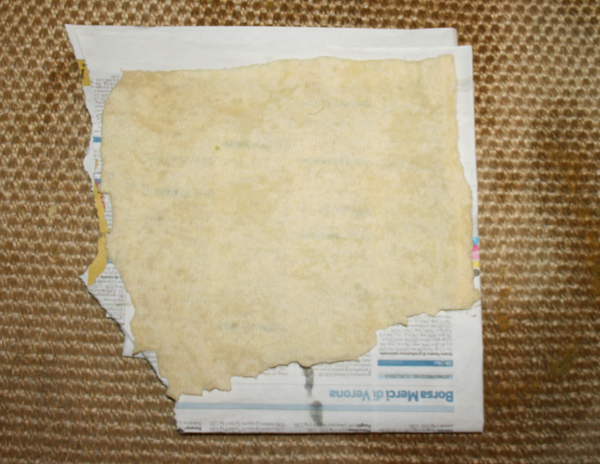
– rimuovete le tavole di pressatura e smontate la pila separando le pezze e lasciando su ognuna di esse il foglio di carta bagnato;
– potete mettere ogni pezza su un foglio di giornale asciutto

– oppure trasferire i fogli ad asciugare su una superficie impermeabile (questo accelererà di molto il processo)

– in ogni caso l’asciugatura deve avvenire all’aria, a temperatura ambiente. I tempi dipendono dalle condizioni generali, ma in ogni caso è meglio non collocare la carta vicino a fonti di calore, perchè la carta rischierebbe di imbarcarsi.

– se la carta fatta dai bambini, nonostante tutte le precauzioni, risultasse “arricciata” è sempre possibile correggere il difetto col ferro da stiro e ponendo poi i fogli all’interno di una cartellina, di un libro, o conservandola sotto pressione fino al momento di usarla

7. maturazione forse non è una cosa che tutti sanno, ma anche la carta ha bisogno di qualche giorno di maturazione. Naturalmente possiamo decidere di utilizzare la nostra produzione subito dopo l’asciugatura, ma in realtà sarebbe meglio impilarla in una cartellina e lasciarla riposare almeno per una settimana. Questo passaggio renderà la nostra carta molto più resistente


8. collatura superficiale: questa procedura è facoltativa, e spesso non necessaria, soprattutto se abbiamo aggiunto dei collanti alla pasta base. Nella collatura superficiale, il collante viene applicato sui fogli asciutti, dopo averli fatti maturare come spiegato sopra. Per questo genere di collatura possiamo usare sostanze per gelatina (agar agar o colla di pesce).
– sciolto il composto in acqua calda (1 cucchiaino di agar agar per litro d’acqua, o quattro foglietti di colla di pesce sempre per litro), versatelo in una bacinella poco profonda
– immergete un foglio alla volta, per pochi secondi,
– stendetelo poi nuovamente su una pezza o su una superficie impermeabile ad asciugare
– si consiglia di preparare poco “collante” per volta, perchè raffreddando solidifica.
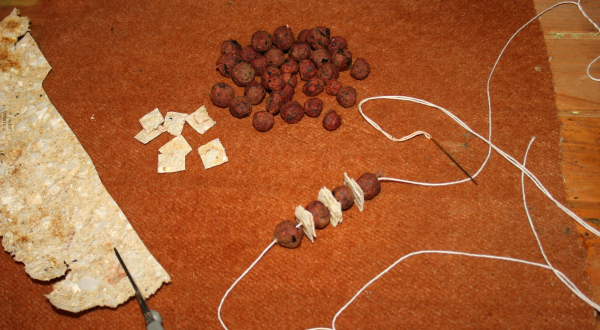
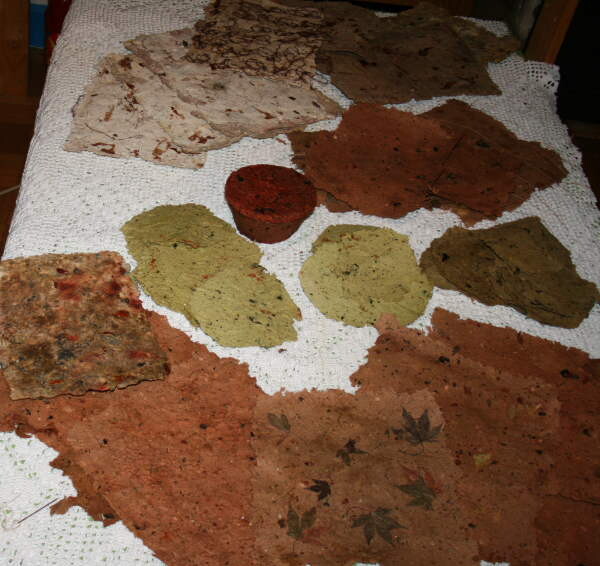
Qui un esempio di utilizzo


Paper making with kids – historical notes on the manufacture of paper, basic equipment and general advice to start making paper with the children at home and school, tutorials.
Historical notes on the manufacture of paper
The ancestor of the paper is the papyrus, which was used by the Egyptians to the hieroglyphic writing as early as 2000 BC. The papyrus was produced from the pulp inside the stem of the papyrus, an aquatic plant. The pulp was cut into thin strips which were then wet, paired to form a sheet in two layers, then pressed and finally dried in the sun.

http://www.storiadelleimmagini.it/2011/01/fabbricazione-del-papiro-pennelli-inchiostri-egitto/
The papyrus from Egypt, spread also in Hebrews, Babylonians, and also all over the world greek-roman.
Before the invention of paper were also prevalent alternative materials to papyrus, which writable sheets, made from bark or stem of some trees, bamboo strips, leaves, fabrics, and animal skins (parchment and vellum).
http://blog.fmrarte.it/tecniche-artigianali/pergamena/
The invention of paper is due to Ts’ai Lun, an official of the Chinese Emperor Ho Ti, and it came in the second century BC. Ts’ai Lun discovered that it was possible to macerate, and make a paste from fibrous materials such as cotton rags, remnants of fishing nets, plants such as hemp and mulberry. What obtained by collecting the paste on a woolen fabric taut, so that dry out, was in fact a sheet of paper.
The invention quickly spread throughout China, and the technique was perfected more and more. For many centuries the Chinese jealously guarded the secret of papermaking, but at some point this art reached Japan. For the diffusion of paper in the West, however, we must wait until the eighth century. When the Arabs, in fact, conquered Persia, the Chinese masters skilled papermakers unveiled the winners their art, which was popularized in India, Egypt, Palestine, and later in Spain and in the rest of Europe around 1150.
In Europe, the paper had no immediate fortune, because the paper from the East was very absorbent and not very suitable for writing with a goose quill. To this was introduced a variant of manufacture: for pasta, is utilized only of cotton rags, flax and hemp, and once dry, the sheets were treated with a gelatin derived from bones of various animals, to make them opaque and waterproof.
The paper became increasingly important in the West, up to the complete statement as a material for everyday use in the Renaissance, thanks to the great increase of literary works and books after the invention of printing with movable type.
Paper mills were built all over Europe, and except for a few details, paper-making did not differ much from the east. Instead, the raw materials used were different: in Europe were preferred rags to plant fibers.
Equipment and basic materials to start making recycled paper
Everything you need to produce sheets of recycled paper with the kids, is readily available at home, without incurring charges.
Tub – for macerating the waste paper or vegetable elements that we wish, we can use any bucket, while then when it comes to soak up with the mold, will need to have a rectangular tub, higher dimensional precisely to those of the mold
Waste paper – you can recycle any type of paper, but the most suitable are: photocopy and printer paper, sheets of notebook and similar, bags and brown wrapping paper, egg cartons, cardboard paper and colored tissue paper, watercolor paper. We can also use the newspaper, but in small quantities, because it is a paper often treated with acids and with a high quantity of ink.
Plant fibers – we can use many vegetables in papermaking. Among those with a long fiber, the most suitable are asparagus, the daffodils, the stems of many bulb flowers, rhubarb, celery, spinach. The vegetables can be used both fresh and dried. All these fibers are crushed by boiling them in water. Other plants, instead, require chemical treatments (usually using sodium carbonate). As for paper, also vegetable fibers must be macerated in order to facilitate the release of the cellulose. The most effective way is to crush them after boiling, with a rolling pin. It takes about twenty minutes, but consider that most fibers are macerated, the better the quality of the paper.
Vegetables and other plants for special effects – onion skins, eggplant, seaweed and other vegetables and plants used in addition to waste paper, no need to be “crushed”, instead boiling is optional and depends on the effect you want to achieve. The onion skins are usually the most appreciated. We can add them dry to a “mixed” paste, or we can use them after boiling, in addition to the waste paper white.
Vinyl glue or other adhesives: adding to the mixture a small amount of glue can be very useful, especially for the first experiments of making paper by hand, because it increases the likelihood of success and allows to obtain papers less absorbent and more suitable for receive the writing. We may also use wallpaper glue powder, or even add to the mix a little cornstarch and a cup of vinegar.
Electric mixer – is used to obtain the paste from macerated paper.
Spoons and containers for pouring
Colander is useful for filtering the paste or vegetable fibers (cold or after boiling)
gloves
Frame and mold are two separate pieces. The mold is a frame of wood to which is applied a net. The frame is a second frame, identical to the previous one, but without a net. The height of the frame can determine the thickness of the sheet, and definitely determines the shape. Are used together: the frame is positioned on the mold, taking the net facing upward. After being immersed in the tub, frame and mold are raised together, so that the excess of water to drip through the net, which will keep the paste instead. The typical irregular margins of handmade paper depend precisely from the fact that small amounts of paste seep through the gap between the mold and the frame.
This is an example of mold on the market (A4 size, cost € 8.40):

http://it.opitec.com/opitec-web/articleNumber/476975/
As you can see the cost is not excessive, but it can be challenging, if we want to bring the activities at school. Before you give up the idea, consider that build their own mold is very simple and really cheap: for the net we can use pieces of mosquito net, tulle, a nylon stocking, metal nets, etc. … frames can be made easily with strips of reclaimed wood (perhaps organizing a mini-woodworking workshop with the children), you can also make beautiful handmade paper also using only the mold (without frame), and often at IKEA there are frames of wood or plastic very economic and very suitable for the purpose.
With children it is advisable to have small molds, for example, you can successfully use the embroidery frames:
Even more affordable, and easily made by children, is this solution:
Of course, depending on the type of net choice, the final effect may also vary greatly. With the metal nets are obtained textured sheets, while with the fabric nets, the sheets are more smooth.
Patches and rags – once ready, each sheet must be transferred from the mold on a piece of wet tissue (preferably wool). These patches serve as a support for the paper, and absorb excess water. You can get them from old sweaters and blankets, but you can also use synthetic sponge rags and kitchen towels.
Sheets of paper are very useful to absorb water during pressing, and to protect the work surface
Pressing boards and clamps – formed the stack, the sheets are pressed to remove as much water as possible and promote adhesion of the fibers. The stack of sheets is then placed between two wooden boards, then blocked with clamps and possibly weights (for example a bag full of stones). The principle is that our sheets need to be pressed, so instead of clamps can also use for example stacks of bricks or similar, gradually increasing the weight.
General tips for making paper – basic technique
1. preparation of recycled paper pulp : uncork the paper into small pieces (children like to do this)
cover with water
add any dyes, vegetable, etc. …
and, if desired, the adhesive selected
Do macerate for one night: this greatly simplifies the preparation of the pulp. If the paper is abundant it is advisable to use hot water.
The next day, mix the macerated material,
and now you have your basic pulp.
It is advisable to mix small amounts at a time, intermittently, and for no longer than 10 seconds. We must not chop too much the fiber, otherwise we will have sheets very fragile and loosely compacted.
You can then add to the basic pulp, if desired, other decorative items such as seeds, dried flowers, leaves, various herbs, flakes, silk threads, and whatever your imagination suggests.
If, however, you want to obtain a paper as clear as possible, before mix rinse the macerated paper in a strainer or a colander with cold water in order to remove residual ink and additives in the paper.
1. preparation of the pulp “onionskin”
– Put to macerate waste paper exclusively white
– Peeled some onions, cut the the skins into pieces quite small and put them in a saucepan with water. Simmer for about 40 minutes. The onion skins are a well-known natural dye, as you can see observing the water boiling.
– Mix together the macerated white paper, and the skins cooked, add the boiling water, which will serve to paint a beautiful amber color your pape
1. preparation of the pulp plant fibers (without the addition of waste paper). As mentioned above, we can make beautiful handmade papers using spinach, celery, rhubarb, daffodils and stems of bulb flowers (hyacinths etc …) With a little practice you learn how to choose the most suitable materials, also depending on the result we want to achieve. The procedure is this:
– Cut the stems into pieces about 7 cm long
– Put in a saucepan, add any flowers and leaves of the plant choice, cover with water and heat to boiling. Then lower the flame and simmer for at least 30 minutes
– remove from flame and reduce the stems into small pieces (wearing rubber gloves). If the fibers separate easily, it means that they are ready, and if the stems are still compact need to return to a boil, still a little
– When the fibers are ready, drain and rinse under running water in a colander. The water boiling can instead serve as a colorant, and stored at part
– for reducing to a pulp the fibers, we discourage the use of electric mixer, because it is very important not to break too much the fiber. Better to put them on a wooden cutting board or in a mortar and crush with a rolling pin repeatedly. This operation is the most important, and longer the fibers will be worked, better is the quality of the paper.
– to see if we have done a good job we can try to soak a handful of fibers in a glass of water: if mixing blend perfectly, we can be satisfied, while if they tend to sink to the bottom, we must crush them a little more.
2. preparation of the tub: pour the basic pulp choice in the tub filled with water (a optimum ratio is one part of pulp and four of water), because how much more mixture is concentrated, more the paper will be of great thickness.
During the manufacture of the sheets remember to stir occasionally to evenly distribute the fibers which would otherwise tend to settle on the bottom.
3. preparation of the sheets:
– Wet the net of the mold so that the paste is able to drain more easily.
– Then place the frame on the mold (with the net side up)
and, firmly holding together the two pieces, soak them in the tub and slowly move to collect the paste evenly on the net.
– Extract and let drip off, taking the two pieces in horizontal position.
– When most of the water has slipped away, shake several times to promote adhesion of the fibers.
– Remove the frame carefully
– (With the children can not also use the frame, and collect the pulp with the mold only: in this case, simply, we will obtain sheets with margins less uniform)
– If, at the end of work, advancing a bit of pulp, after it has been filtered it through a sieve you can store it in a closed container for about three weeks … do not pour it down the sink ever: it may obstruct pipes! Rather filtered and thrown into the dustbin. The pulp, then, can also be used as a modeling dough to achieve bowls, beads, etc. …
4. preparation of the stack of sheets
– Made a sheet, it should be moved on the wet patches (not soaked) for drying and pressing.
– moved the sheet, you can add any other decorative elements. At the end cover with a second patch and a few sheets of newspaper, and then proceed in the same way with the subsequent sheets.
5. pressing
– The stack of paper and patches to be put under pressure to remove water and promote adhesion of the fibers.
– Whether you use boards and clamps, whether you use tables and weights, the pressure should be increased gradually, as the excess water is removed
– To remove most of the water takes about half an hour
– The amount of water removed during pressing can be a lot, so it is recommended you do this outdoors if possible, or to adequately protect the work surface with a thick layer of absorbent towels
6. drying
– Remove the tables of pressing, and removed the battery, leaving on each piece of wool, a wet sheet of paper;
– You can put every piece of wool on a dry sheet of newspaper
– Or transfer the sheets to dry on an impermeable surface (this will greatly accelerate the process)
– In each case the drying shall take place in air, at room temperature. The time depends on general conditions but in any case it is better not to place the paper near heat sources, because the paper might curl.
– If the card made by the children, in spite of all precautions, proves “curled” you can always correct it with an iron and then placing the sheets in a folder, a book, or storing it under pressure until to use
7. aging – perhaps it is something that everyone knows, but the paper needs a few days of ripening. Of course we can decide to use our production immediately after drying, but it would be better to stack it in a folder and let it rest for at least a week. This step will make our paper more resistant
8. surface gluing: This procedure is optional and often not necessary, especially if we added some glue to the pulp. In surface gluing, the adhesive is applied to the sheets of paper dry, after having made them mature as explained above. For this kind of gluing we use substances such as agar agar or isinglass.
– Dissolve the mixture in hot water (1 teaspoon of agar agar per liter of water, or four sheets of isinglass always per liter), pour into a shallow basin
– Dip a sheet at a time for a few seconds,
– Then lay it again on a patch or on an impermeable surface to dry
– You may want to prepare a little “glue” for once, because cooling solidifies.
Here is an example of using: