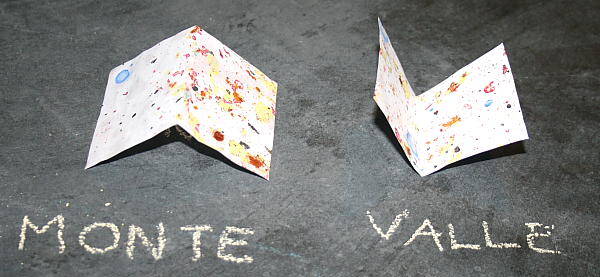
Tutorial pop up 30 – modello pdf scaricabile e stampabile gratuitamente e istruzioni per realizzare pagine pop up coi bambini. Si tratta delle figure di base, da personalizzare a piacere aggiungendo elementi e decorazioni.
Per realizzare i modelli io ho usato la nostra carta marmorizzata, ma per tutti i pop up la carta migliore è il cartoncino lucido, che è resistente e scivola bene.
Tutti i tutorial in programma sono questi:
li potrai trovare qui: https://www.lapappadolce.net/category/tutorial/carta-tutorial/pop-up/
___________________________
QUI il pdf: tutorial pop up 30
______________________________
MATERIALE OCCORRENTE
carta
cartamodello, da ingrandire a piacere (se volete)
forbici e taglierino
colla da carta
matita
COME SI FA
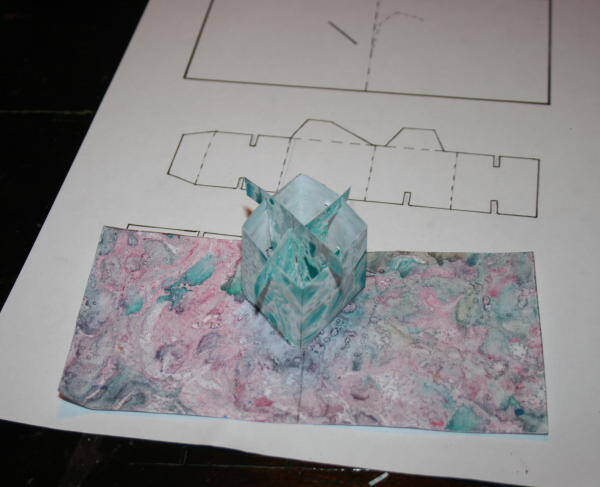
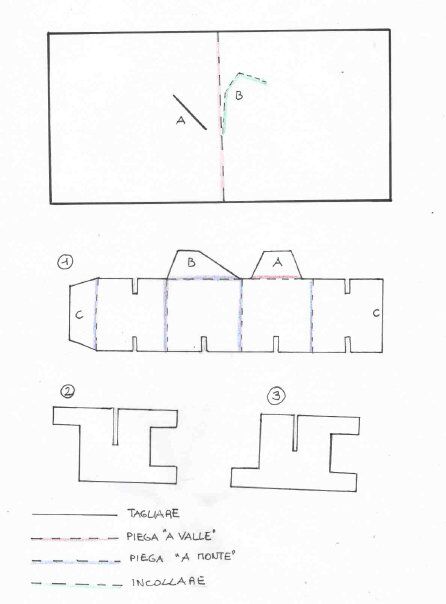
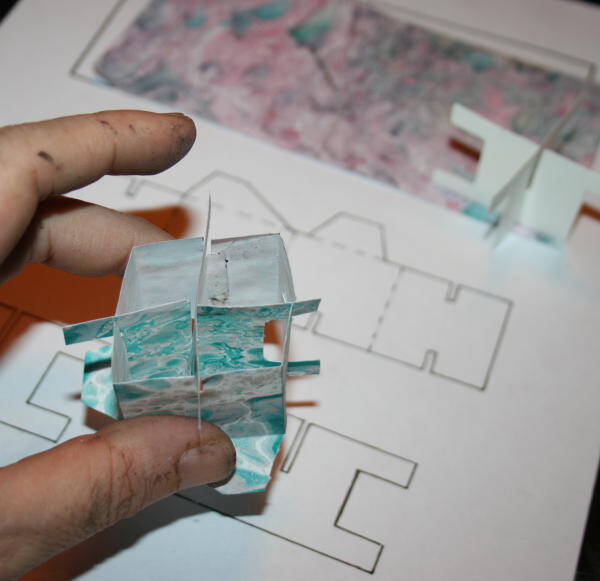
Riportate il modello sulla carta scelta (salvo diversa indicazione, sul diritto) e ritagliate i vari elementi. Procedete con le piegature “a monte” e “a valle” come indicato nel modello.
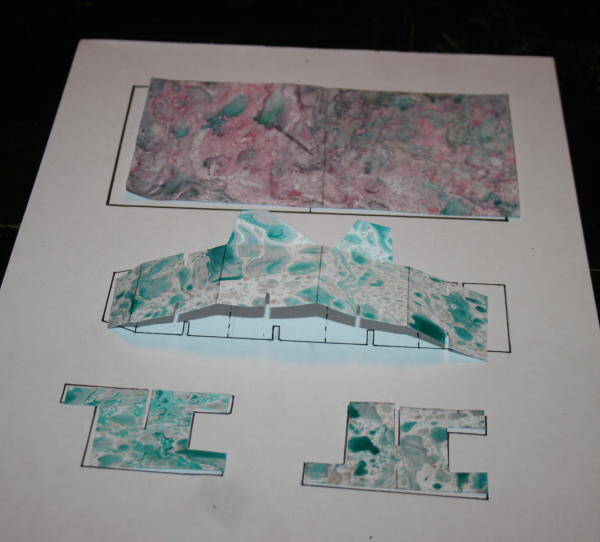
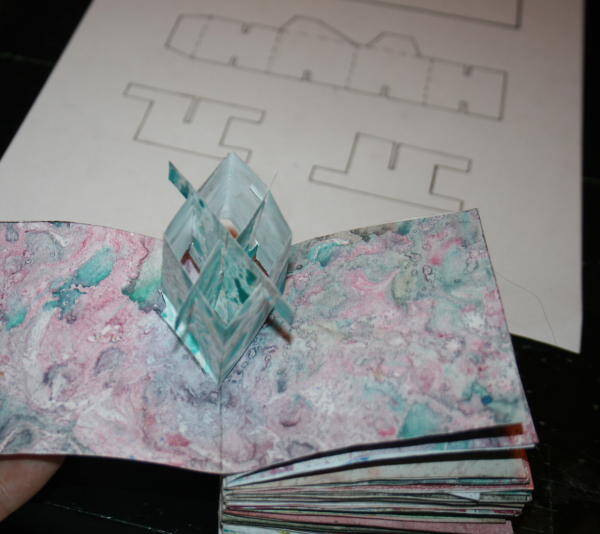
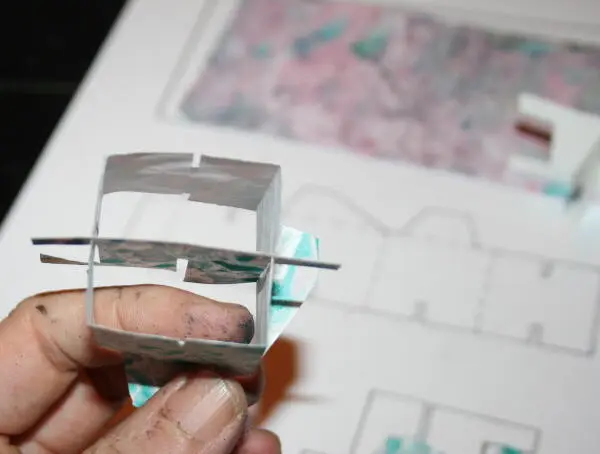
dopo aver chiuso la forma incollando la linguetta C sul segno C, incastrare gli elementi 2 e 3 nell’elemento 1, così:
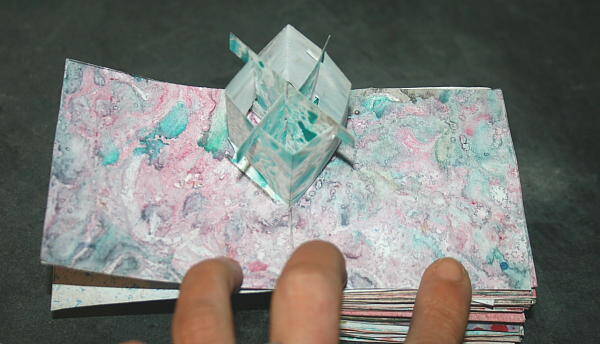
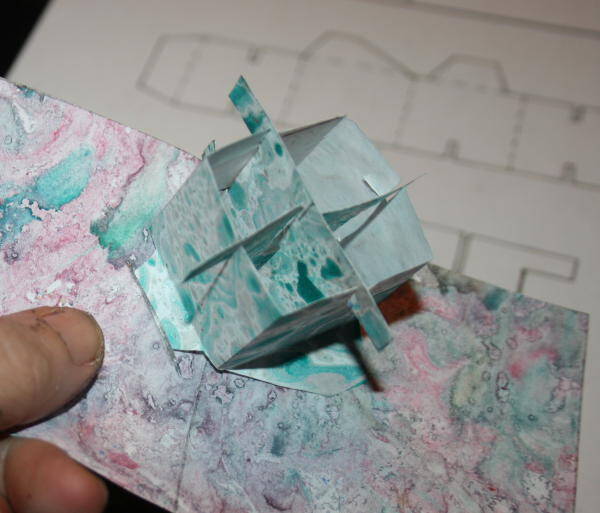
incollare poi la linguetta A sul segno A presente sulla pagina di sinistra, e la linguetta B sul segno presente sulla pagina di destra, così:
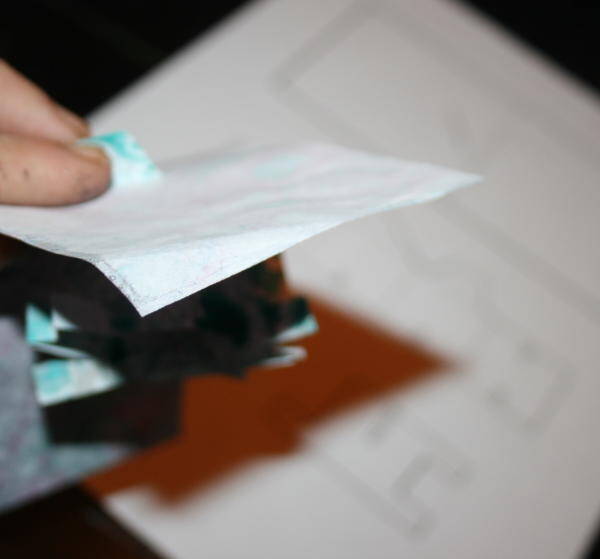
infilare la linguetta A attraverso il taglio A praticato sulla pagina di sinistra:
e incollare la linguetta sul retro:
incollare poi la linguetta B sul segno B presente nella pagina di destra, ed è fatta:
Tutorial pop up 30 – free downloadable and printable pdf pattern and instructions to create pages pop up with the kids. These are the basic shapes, to customize as you like by adding elements and decorations.
To create the models I used our marbled paper, but for all the pop-ups the best card is glossy cardstock, which is durable and glides well.
All tutorials in the program are these:
___________________________
(MONTE = mountain / VALLE = valley)
TAGLIARE = cut
PIEGA “A VALLE” = fold “valley”
PIEGA “A MONTE”= fold “mountain”
INCOLLARE = glue
SUL RETRO = back
pdf: tutorial pop up 30
______________________________
MATERIALS REQUIRED
sheets of paper, the model to be enlarged as desired (if you want), scissors and cutter, glue, pencil
HOW TO DO
Draw the pattern on the paper of your choice (unless otherwise indicated on the right) and cut out the various elements. Proceed with the folds “mountain” and “valley” as shown in the model.
after closing the shape by gluing the tab C, on the sign C, fit the elements 2 and 3 in the element 1, as follows:
then glue tab A on the sign A, present on the left page, and tab B on the mark on the right-hand page, like this:
insert tab A into the cut A, practiced on the left page:
and glue the tab on the back:
then glue tab B on the mark B on the right page and you’re done: